Präsentation herunterladen
Die Präsentation wird geladen. Bitte warten

1
Solaris - Systemadministration
Werner Sinz (RUS): Vorstellung WS, seit Anf.00 am RUS, Unteranderem Betreueung von Solaris-Servern, momentan vor allem fuer die UB. Vorher IPVR WS-Betreuung… Solaris - Systemadministration Rechenzentrum Universität Stuttgart
: Vorstellung. WS, seit Anf.00 am RUS, Unteranderem Betreueung von Solaris-Servern, momentan vor allem fuer die UB. Vorher IPVR WS-Betreuung… Solaris - Systemadministration. Rechenzentrum. Universität. Stuttgart.")
2
1. Einführung

3
1. Einführung Kursablauf Inhalt Umfang Zielgruppe Zielgruppe
Werner Sinz (RUS): Zielgruppe - ist weder der UNIX-Anfaenger, der gerade von W-95 umsattelt -> UNIX Einfuehrung letzte Woche - noch der UNIX-Guru der jetzt die speziellen Solaris-Tricks bei der Crash-Dump-Analyse mit adb sucht (Wer das letzte verstanden hat, ist wahrscheinlich schon falsch). - sondern der Anwender des seine Maschinen selber verwalten will/soll, - oder der "angehende" Sysadmin mit grundlegenden UNIX-Kenntnissen - evtl. der Benutzer/Sysadmin der von einem anderen UNIX-System umsteigt 1. Einführung Kursablauf Inhalt Umfang Zielgruppe
: Zielgruppe. - ist weder der UNIX-Anfaenger, der gerade von W-95 umsattelt -> UNIX Einfuehrung letzte Woche. - noch der UNIX-Guru der jetzt die speziellen Solaris-Tricks bei der Crash-Dump-Analyse mit adb sucht (Wer das letzte verstanden hat, ist wahrscheinlich schon falsch). - sondern der Anwender des seine Maschinen selber verwalten will/soll, - oder der angehende Sysadmin mit grundlegenden UNIX-Kenntnissen. - evtl. der Benutzer/Sysadmin der von einem anderen UNIX-System umsteigt. 1. Einführung. Kursablauf. Inhalt. Umfang. Zielgruppe.")
4
Inhalt Einführung Solaris-Umfang Solaris-Installation Der Monitor
Der Bootvorgang Softwareinstallation Patchinstallation Solaris-Dateisysteme Eigene Dateisysteme NFS NIS Benutzerverwaltung Netzwerkverwaltung Systemdienste Backup – Restore SUN-Serviceangebot Weitere Informationen

5
Aufgaben des Sysadmin What are system administrators?
In general, sysadmins are those people we complain to when our computer systems aren't working the way we expect. If they can make everything right, then they must be system administrators. Therefore, a system administrator is someone who solves problems in computer and network systems operations. Tasks of the system administrators : The problem set in computing and network operations generally includes all those system tasks users might want to offload -- specification, evaluation, installation, configuration, integration, maintenance, data-integrity management, upgrade management, automation, security management, performance analysis, failure analysis,failure mitigation, recovery design, recovery implementation, testing, and more. From: Dr. Dobb's Journal Fall 1999 “The future looks bright for problem solvers”. By Barbara Dijker (vice president of the System Administrators' Guild (SAGE))
)")
6
Ziele Grundlegende UND Solaris-spezifische Infos zum Betrieb von SUN-SPARC-Systemen (nicht INTEL!)
")
7
SUN-Systeme http://www.sun.de/Produkte/Hardware/index.html
Werner Sinz (RUS): Demo: Mit netscape die Produkte anschauen bei Bedarf: s. Prospekte Thin-Client Workstation Workgroup-Server … SUN-Systeme Thin-Clients Workstations Workgroup-Server …
: Demo: Mit netscape die Produkte anschauen bei Bedarf: s. Prospekte. Thin-Client. Workstation. Workgroup-Server. … SUN-Systeme. Thin-Clients. Workstations. Workgroup-Server. …")
8
2. Solaris-Umfang

9
Solaris-Software Solaris-Aufbau: Solaris 1 => SunOS 4.x (BSD)
SunOS (Kernel) für SPARC, Intel, PowerPC Open Network Computing (TCP/IP, …) Graphische Oberfläche (CDE, …) Deskset-Tools (Shells, Audiotool, …) Solaris 1 => SunOS 4.x (BSD) Solaris 2.x => SunOS 5.x , bis 5.6 (SVR4) Solaris 7 => SunOS 5.7 ( `` ) Solaris 8 => SunOS 5.8 ( `` ) uname –r (-r Prints the operating system release level.)
 für SPARC, Intel, PowerPC. Open Network Computing (TCP/IP, …) Graphische Oberfläche (CDE, …) Deskset-Tools (Shells, Audiotool, …) Solaris 1 => SunOS 4.x (BSD) Solaris 2.x => SunOS 5.x , bis 5.6 (SVR4) Solaris 7 => SunOS 5.7 ( `` ) Solaris 8 => SunOS 5.8 ( `` ) uname –r (-r Prints the operating system release level.)")
10
Zusatz-Software SUN Management Center (SyMON)
Oracle 8i Enterprise Edition (Solaris 8) StarOffice Netscape Freeware … DiskSuite
 StarOffice. Netscape. Freeware. … DiskSuite.")
11
DiskSuite-Funktionen
Disk mirroring and RAID-5 Hot-spare facility Disk striping UNIX logging Alternate path support A graphical user interface A performance monitor Concatenation and “grow file system” command SNMP traps DiskSuite-Funktionen: - Disk mirroring and RAID-5 handle all disk failures transparently - A hot-spare facility provides automatic online recovery - Disk striping enables parallel I/O and load balancing for improved performance - UNIX logging speeds system recovery - Alternate path support enables Solstice DiskSuite to use multiple data paths in the event of failure - A graphical user interface simplifies management - A performance monitor helps eliminate bottlenecks - Concatenation and the grow file system command allow the construction of large logical devices and enable online expansion and reconfiguration - SNMP traps for event notification - Complete localization support

12
DiskSuite-Versionen Solaris 7 oder Solaris 2.6 Server Version
Bestandteil des Solaris Easy Access Server Solaris 8: base platform

13
3. Solaris-Installation

14
Installationsarten Neuinstallation Aktualisierung

15
Installationsmethoden
Werner Sinz (RUS): s. Solaris 8 “Advanced Install-Guide”, S. 22. Und “Installation Guide” Nach dieser Folie -> Demo “boot cdrom” => ca. 5 min bis Openwin getartet ist… Eingaben…=> Gesamt max. 10min WebStart (2.8) braucht einiges laenger! Zeigen, dass Konsole geoeffnet werden kann => Notboot Boot-Server muss im gleichen Subnetz sein (ohne Router dazwischen) Installationsmethoden Interaktive Installation Von lokaler CD-ROM [> boot cdrom] WebStart (ab Solaris 8) Interaktive Netz-Installation Installations- und Bootserver erforderlich [> boot net] JumpStart Bei Neusystemen von vorinstalliertem Image [autom.] Custom JumpStart Für “große” Installationen [> boot net] - s. Solaris 8 “Advanced Install-Guide” und “Installation Guide” - Boot-Server muss im gleichen Subnetz sein (ohne Router dazwischen)
: s. Solaris 8 Advanced Install-Guide , S. 22. Und Installation Guide Nach dieser Folie -> Demo boot cdrom => ca. 5 min bis Openwin getartet ist… Eingaben…=> Gesamt max. 10min. WebStart (2.8) braucht einiges laenger! Zeigen, dass Konsole geoeffnet werden kann => Notboot. Boot-Server muss im gleichen Subnetz sein (ohne Router dazwischen) Installationsmethoden. Interaktive Installation. Von lokaler CD-ROM [> boot cdrom] WebStart (ab Solaris 8) Interaktive Netz-Installation. Installations- und Bootserver erforderlich [> boot net] JumpStart. Bei Neusystemen von vorinstalliertem Image [autom.] Custom JumpStart. Für große Installationen [> boot net] - s. Solaris 8 Advanced Install-Guide und Installation Guide - Boot-Server muss im gleichen Subnetz sein (ohne Router dazwischen)")
16
Installation über Uni-Netz
Werner Sinz (RUS): Demo: Adresse anwaehlen im Browser Installation über Uni-Netz s. “Installation SOLARIS 7 über das Rechnernetz der Universität Stuttgart” auf:
: Demo: Adresse anwaehlen im Browser. Installation über Uni-Netz. s. Installation SOLARIS 7 über das Rechnernetz der Universität Stuttgart auf:")
17
Beginn der Installation
Werner Sinz (RUS): Demo: Shutdown (Vorher Stop+A und resume…) Boot cdrom, bis Fenster kommt, “Commandtool oeffnen … Notboot Parallel zum Booten weitermachen mit naechster Folie, da zeitintensiv! Beginn der Installation Monitor-Modus (Boot/ok-Prompt) “shutdown –i0” oder “halt” oder [Stop]+[A] oder [Break] boot cdrom (net)
: Demo: Shutdown. (Vorher Stop+A und resume…) Boot cdrom, bis Fenster kommt, Commandtool oeffnen … Notboot. Parallel zum Booten weitermachen mit naechster Folie, da zeitintensiv! Beginn der Installation. Monitor-Modus (Boot/ok-Prompt) shutdown –i0 oder. halt oder. [Stop]+[A] oder. [Break] boot cdrom (net)")
18
Daten für die Installation
Hostname IP-Adresse Netzmaske Nameservice Zeitzone Festplattenaufteilung Rechnertyp Standalone Server Umfang der Betriebssystem-software Root-Kennwort

19
Festplattenaufteilung - I
Werner Sinz (RUS): /var scheint aber doch sinnvoll!!? Festplattenaufteilung - I Benötigter Plattenplatz: Entire Distribution Plus OEM Support 2.4 Gbytes Entire Distribution Gbytes Developer System Support Gbytes End User System Support Gbytes Create a minimum number of file systems. By default, the Solaris 8 creates only root (/), /usr /swap
: /var scheint aber doch sinnvoll!! Festplattenaufteilung - I. Benötigter Plattenplatz: Entire Distribution Plus OEM Support 2.4 Gbytes. Entire Distribution 2.3 Gbytes. Developer System Support 1.9 Gbytes. End User System Support 1.6 Gbytes. Create a minimum number of file systems. By default, the Solaris 8 creates only. root (/), /usr. /swap.")
20
Festplattenaufteilung – II
/ Root-FS 1 Swap Swap-Space und /tmp 2 Backup Gesamte Platte (overlap) 3 /var Variable Daten (Printing, Mail, Logs, Dumps…) 4 5 /opt Optionale SW (Third Party) 6 /usr System-Programme 7 /export Heimverzeichnisse, Daten, … Layout Systemplatte! Datenplatten haben oft nur eine Partition belegt.
 3. /var. Variable Daten (Printing, Mail, Logs, Dumps…) /opt. Optionale SW (Third Party) 6. /usr. System-Programme. 7. /export. Heimverzeichnisse, Daten, … Layout Systemplatte! Datenplatten haben oft nur eine Partition belegt.")
21
4. Der Monitor Demo: Nach dem Installwindow da
Werner Sinz (RUS): Demo: Nach dem Installwindow da > folgt wieder Stop+A => Monitor 4. Der Monitor
: Demo: Nach dem Installwindow da. > folgt wieder Stop+A => Monitor. 4. Der Monitor.")
22
Monitor-Befehle Booten Hilfe System Informationen Diagnose
Werner Sinz (RUS): Demo: Probe-scsi Show-disks - help Monitor-Befehle Booten boot [disk|net|cdrom|…] Hilfe help System Informationen .enet-addr probe-scsi probe-scsi-all show-disks Diagnose test-all test floppy (memory/net) NVRAM-Parameter printenv Setenv pn pv Setdefault pn Set-defaults
: Demo: Probe-scsi. Show-disks. - help. Monitor-Befehle. Booten. boot [disk|net|cdrom|…] Hilfe. help. System Informationen. .enet-addr. probe-scsi. probe-scsi-all. show-disks. Diagnose. test-all. test floppy (memory/net) NVRAM-Parameter. printenv. Setenv pn pv. Setdefault pn. Set-defaults.")
23
NVRAM-Parameter Monitor: SunOS: Printenv eeprom > …
Werner Sinz (RUS): Eeprom-Demo aus telnet/ssh-Fenster auf PC? NVRAM-Parameter Monitor: Printenv SunOS: eeprom > diag-level =max > keyboard-click? =false > output-device =screen > input-device =keyboard > boot-command =boot > auto-boot? =true > watchdog-reboot? =true > boot-device =disk net > security-mode =none > security-password: data not available. > diag-switch? =false > …
: Eeprom-Demo aus telnet/ssh-Fenster auf PC NVRAM-Parameter. Monitor: Printenv. SunOS: eeprom. > diag-level =max. > keyboard-click =false. > output-device =screen. > input-device =keyboard. > boot-command =boot. > auto-boot =true. > watchdog-reboot =true. > boot-device =disk net. > security-mode =none. > security-password: data not available. > diag-switch =false. > …")
24
5. Der Bootvorgang

25
Booten Einschalten (wenn autoboot=true)
Reboot (aus OS, wenn autoboot=true) Boot (im Monitor Prompt) Kernel wird geladen (/kernel/genunix) Nachladen von Kernelmodulen /etc/system verarbeiten Starten des init-Prozesses Aus bootblock der Platte
 Boot (im Monitor Prompt) Kernel wird geladen (/kernel/genunix) Nachladen von Kernelmodulen. /etc/system verarbeiten. Starten des init-Prozesses. Aus bootblock der Platte.")
26
/etc/system Setzen von Kernelvariablen Ladbare Module
Werner Sinz (RUS): Demo: Admin> cat /etc/system /etc/system Setzen von Kernelvariablen rootdev: <device name> # rootfs: <type> # rootfs:ufs moddir: # moddir: /kernel /other/modules set [<mod>:]<sym> # set maxusers=40 = <value> # set shmsys:shminfo_shmmax=523288 Ladbare Module exclude: <subdir>/<name> # exclude: sys/shmsys include: <subdir>/<name> # include: other/mymod forceload:<subdir>/<name> # forceload: drv/socal
: Demo: Admin> cat /etc/system. /etc/system. Setzen von Kernelvariablen. rootdev: <device name> # rootfs: <type> # rootfs:ufs. moddir: # moddir: /kernel /other/modules. set [<mod>:]<sym> # set maxusers=40. = <value> # set shmsys:shminfo_shmmax= Ladbare Module. exclude: <subdir>/<name> # exclude: sys/shmsys. include: <subdir>/<name> # include: other/mymod. forceload:<subdir>/<name> # forceload: drv/socal.")
27
Prozeßinitialisierung durch “init”
Init wird vom kernel beim booten gestartet pid = 1 Versetzt das System in den Angegebenen Runlevel (z.B. init 0) oder Default-Runlevel laut /etc/inittab Startet die Scripte aus /etc/inittab
 oder. Default-Runlevel laut /etc/inittab. Startet die Scripte aus /etc/inittab.")
28
Runlevel 0 = Shutdown-Zustand 1 = Administrations-Zustand
2 = Mehrbenutzerbetrieb 3 = Mehrbenutzerbetrieb mit Netzwerk 5 = Reboot interaktiv (boot –a) 6 = Reboot (inittab-Default) S oder s = Single-User Zustand (boot –s) init 5 frägt Parameter für Reboot ab, z.B.: Module-Verzeichnis, root device, system file, ... init-Befehle aus Solaris: /sbin/init [ abcQqSs ] - process control initialization 0 Go into firmware. 1 Put the system in system administrator mode. All local file systems are mounted. Only a small set of essential kernel processes are left running. This mode is for administrative tasks such as installing optional utility packages. All files are accessible and no users are logged in on the system. 2 Put the system in multi-user mode. All multi-user environment terminal processes and daemons are spawned. This state is commonly referred to as the multi-user state. 3 Extend multi-user mode by making local resources available over the network. 4 Is available to be defined as an alternative multi- user environment configuration. It is not necessary for system operation and is usually not used. 5 Shut the machine down so that it is safe to remove the power. Have the machine remove power, if possible. 6 Stop the operating system and reboot to the state defined by the initdefault entry in /etc/inittab. a, b, c process only those /etc/inittab entries having the a, b, or c run level set. These are pseudo-states, which may be defined to run certain commands, but which do not cause the current run level to change. Q, q Re-examine /etc/inittab. S, s Enter single-user mode. This is the only run level that doesn't require the existence of a properly for- matted /etc/inittab file. If this file does not exist, then by default, the only legal run level that init can enter is the single-user mode.
 6 = Reboot (inittab-Default) S oder s = Single-User Zustand (boot –s) init 5 frägt Parameter für Reboot ab, z.B.: Module-Verzeichnis, root device, system file, ... init-Befehle aus Solaris: /sbin/init [ abcQqSs ] - process control initialization. 0 Go into firmware. 1 Put the system in system administrator mode. All local. file systems are mounted. Only a small set of essential. kernel processes are left running. This mode is. for administrative tasks such as installing optional. utility packages. All files are accessible and no. users are logged in on the system. 2 Put the system in multi-user mode. All multi-user. environment terminal processes and daemons are. spawned. This state is commonly referred to as the. multi-user state. 3 Extend multi-user mode by making local resources. available over the network. 4 Is available to be defined as an alternative multi- user environment configuration. It is not necessary. for system operation and is usually not used. 5 Shut the machine down so that it is safe to remove the. power. Have the machine remove power, if possible. 6 Stop the operating system and reboot to the state. defined by the initdefault entry in /etc/inittab. a, b, c process only those /etc/inittab entries having the a, b, or c run level set. These are pseudo-states, which. may be defined to run certain commands, but which do. not cause the current run level to change. Q, q Re-examine /etc/inittab. S, s Enter single-user mode. This is the only run level. that doesn t require the existence of a properly for- matted /etc/inittab file. If this file does not. exist, then by default, the only legal run level that. init can enter is the single-user mode.")
29
/etc/inittab – I zsdjh:~<14:02-66> cat /etc/inittab
Werner Sinz (RUS): Demo: cat /etc/inittab auf admin… , dann gleich naechste Folie zur Erklaerung /etc/inittab – I zsdjh:~<14:02-66> cat /etc/inittab ap::sysinit:/sbin/autopush -f /etc/iu.ap ap::sysinit:/sbin/soconfig -f /etc/sock2path fs::sysinit:/sbin/rcS >/dev/console … is:3:initdefault: p3:s1234:powerfail:/usr/sbin/shutdown -y -i5 -g0 >/dev/console … s0:0:wait:/sbin/rc >/dev/console … s1:1:wait:/usr/sbin/shutdown -y -iS -g0 >/dev/console … s2:23:wait:/sbin/rc >/dev/console … s3:3:wait:/sbin/rc >/dev/console … s5:5:wait:/sbin/rc >/dev/console … Ist Kein runlevel angegeben => gilt fuer alle Runlevel!
: Demo: cat /etc/inittab auf admin… , dann gleich naechste Folie zur Erklaerung. /etc/inittab – I. zsdjh:~<14:02-66> cat /etc/inittab. ap::sysinit:/sbin/autopush -f /etc/iu.ap. ap::sysinit:/sbin/soconfig -f /etc/sock2path. fs::sysinit:/sbin/rcS >/dev/console … is:3:initdefault: p3:s1234:powerfail:/usr/sbin/shutdown -y -i5 -g0 >/dev/console … s0:0:wait:/sbin/rc0 >/dev/console … s1:1:wait:/usr/sbin/shutdown -y -iS -g0 >/dev/console … s2:23:wait:/sbin/rc2 >/dev/console … s3:3:wait:/sbin/rc3 >/dev/console … s5:5:wait:/sbin/rc5 >/dev/console … Ist Kein runlevel angegeben => gilt fuer alle Runlevel!")
30
/etc/inittab - II s0 : 0 : wait : /sbin/rc0 >/dev/console…
Ausgabeumleitung Ist Kein runlevel angegeben => gilt fuer alle Runlevel Auszuführendes Kommando Steuerungsbefehl für init -> Runlevel fuer die Abarbeitung der Zeile Kennzeichen der Zeile (Label)
")
31
Steuerungsbefehle für init
wait sysinit initdefault respawn / ondemand off once boot bootwait powerfail powerwait sysinit: Aufruf VOR System-Login Initdefault = Standard-Runlevel Wait: Warte bis Proz. Beendet, dann weiter in inittab respawn / ondemand = Bei Absturz-> Neustart Off: beende Prozess erst –HUP, dann -KILL Once: Einmal starten (fire and forget) Boot: waehrend boot Bootwait: waehrend boot auf Prozess warten Powerfail: Signal von USV Powerwait: nach powerfail bei Hochfahren ->fuer fsck
 Boot: waehrend boot. Bootwait: waehrend boot auf Prozess warten. Powerfail: Signal von USV. Powerwait: nach powerfail bei Hochfahren ->fuer fsck.")
32
Von init ausgeführte Kommandos
Werner Sinz (RUS): Demo: cat /sbin/rc3 => Aufruf /etc/rc*.d/S* Ls –l /etc/rc3.d => Links Von init ausgeführte Kommandos Init führt aus: /sbin/rc? (? =runlevel-Nummer) /sbin/rc? Führt aus: /etc/rc?.d/S* beim Start /etc/rc?.d/K* beim Beenden (/etc/rc?.d/* sind Links nach /etc/init.d/*)
: Demo: cat /sbin/rc3 => Aufruf /etc/rc*.d/S* Ls –l /etc/rc3.d => Links. Von init ausgeführte Kommandos. Init führt aus: /sbin/rc ( =runlevel-Nummer) /sbin/rc Führt aus: /etc/rc .d/S* beim Start. /etc/rc .d/K* beim Beenden. (/etc/rc .d/* sind Links nach /etc/init.d/*)")
33
6. Softwareinstallation

34
Softwareinstallation
Werner Sinz (RUS): Demo1: pkginfo –l … Demo2: swmtool / admintool und SW-Auswahl Softwareinstallation Packagemanagement über Befehlszeile Pkgadd - Pkginfo Pkgrm - Pkgask - Pkgchk Graphischer Softwaremanager Swmtool (admintool -> Software)
: Demo1: pkginfo –l … Demo2: swmtool / admintool und SW-Auswahl. Softwareinstallation. Packagemanagement über Befehlszeile. Pkgadd - Pkginfo. Pkgrm - Pkgask. - Pkgchk. Graphischer Softwaremanager. Swmtool (admintool -> Software)")
35
SW-Packages von: Solaris-CDROMs
Werner Sinz (RUS): Demo: Installation mit admintool zsdjh:~<17:19-74> sudo admintool & Browse: software Edit: add Software-Location: Hard-Disk Directory: z.B. /sunswsrv/cdrom_copies/Solaris_7/netscape_4_5/Netscape_Communicator_4.5/sparc/Product/ … Manuell: > sudo pkgadd -d /sunswsrv/cdrom_copies/Solaris_7/netscape_4_5/Netscape_Communicator_4.5/sparc/Product/ SW-Packages von: Solaris-CDROMs sunswsrv.rus.uni-stuttgart.de:/cdrom_copies/… Third Party … Beispiel: Installation mit admintool > sudo admintool & Browse: software Edit: add Software-Location: Hard-Disk Directory: z.B. /sunswsrv/cdrom_copies/Solaris_7/netscape_4_5/Netscape_Communicator_4.5/sparc/Product/ … Installation Manuell: > sudo pkgadd -d /sunswsrv/cdrom_copies/Solaris_7/netscape_4_5/Netscape_Communicator_4.5/sparc/Product/
: Demo: Installation mit admintool. zsdjh:~<17:19-74> sudo admintool & Browse: software. Edit: add. Software-Location: Hard-Disk. Directory: z.B. /sunswsrv/cdrom_copies/Solaris_7/netscape_4_5/Netscape_Communicator_4.5/sparc/Product/ … Manuell: > sudo pkgadd -d /sunswsrv/cdrom_copies/Solaris_7/netscape_4_5/Netscape_Communicator_4.5/sparc/Product/ SW-Packages von: Solaris-CDROMs. sunswsrv.rus.uni-stuttgart.de:/cdrom_copies/… Third Party … Beispiel: Installation mit admintool. > sudo admintool & Browse: software. Edit: add. Software-Location: Hard-Disk. Directory: z.B. /sunswsrv/cdrom_copies/Solaris_7/netscape_4_5/Netscape_Communicator_4.5/sparc/Product/ … Installation Manuell: > sudo pkgadd -d /sunswsrv/cdrom_copies/Solaris_7/netscape_4_5/Netscape_Communicator_4.5/sparc/Product/")
36
Beispiel: “8Pac Compiler”
Installation: /sunswsrv/cdrom_copies/8-PAC/ University_Edition/devpro_v8n1_sparc/installer Lizenz-Installation: Am Ende frägt "License Installation Tool", nach Datei mit Lizenzkeys oder deren manueller Eingabe Lizenzfile (für domainname "uni-stuttgart.de") unter sunswsrv:/general_data/Lizenz/Technisches/sunpro.lic,sp Spätere Lizenz-Installation: /etc/opt/licenses/lit Beispielinstallation: “8Pac Compiler” 1.Die Compiler befinden sich im Verzeichnis sunswsrv:/cdrom_copies/8-PAC.new/University_Edition/devpro_v5n1_sparc Sie können die Installation der Compiler mit dem 'swmtool' vornehmen: Beispiel: Falls Sie sunswsrv.rus.uni-stuttgart.de:/cdrom_copies auf ihrem Rechner unter /sun_software_server/cdrom_copies gemountet haben: swmtool -d /sun_software_server/cdrom_copies/8-PAC.new/University_Edition/devpro_v5n1_sparc 2.Selektieren Sie das gewünschte Produkt und installieren Sie es mit "add". Bevor Sie die Compiler benutzen können, müssen Sie noch die Lizenzcodes installieren. Installation der Lizenzcodes (durch License Manager) 1.Voraussetzung für die Nutzung der Lizenzcodes ist es, daß sich Ihr Rechner in einer DNS (Domain Name System) - Domain befindet, deren Namen auf uni-stuttgart.de endet. Mit anderen Worten heißt das, daß der Name Ihres Rechners in anger Form auf 'uni-stuttgart.de' endet. Falls das nicht der Fall ist und Sie das auch nicht so einrichten können (diese Situation dürfte außergewöhnlich sein) schreiben Sie an Nennen Sie dabei den Namen Ihrer DNS - Domain; aus Ihrer Anfrage sollte ersichtlich sein, warum Sie an der Domain 'uni-stuttgart.de' nicht teilnehmen können. In einem solchen Fall müssen wir Ihnen spezielle Lizenzcodes besorgen. 2.Der License Manager befindet sich im Verzeichnis Sie können die Installation des License Managers mit dem 'swmtool' vornehmen: 3.Wählen Sie jetzt im GUI den License Manager aus, und installieren Sie die Software mit den Button "add". 4.Schließen Sie nach der Installation bitte das swmtool und starten Sie den License Manager. 5.Das Starten des License Managers erfolgt mit /opt/SUNWste/bin/lit Nach dem Start werden Sie vom License Manager nach der 'License information' gefragt. Das Lizenzfile befindet sich unter sunswsrv:/general_data/Lizenz/Technisches/sunpro.lic,sp. 6.Falls Sie sunswsrv.rus.uni-stuttgart.de:/general_data unter /sun_software_server/general_data gemountet haben, geben Sie folgenden Pfad ein: /sun_software_server/general_data/Lizenz/Technisches/sunpro.lic,sp 7.Bestätigen Sie die Installation mit dem Button "install" und schließen Sie den License Manager.
 unter. sunswsrv:/general_data/Lizenz/Technisches/sunpro.lic,sp. Spätere Lizenz-Installation: /etc/opt/licenses/lit. Beispielinstallation: 8Pac Compiler 1.Die Compiler befinden sich im Verzeichnis. sunswsrv:/cdrom_copies/8-PAC.new/University_Edition/devpro_v5n1_sparc. Sie können die Installation der Compiler mit dem swmtool vornehmen: Beispiel: Falls Sie sunswsrv.rus.uni-stuttgart.de:/cdrom_copies auf ihrem Rechner unter. /sun_software_server/cdrom_copies gemountet haben: swmtool -d /sun_software_server/cdrom_copies/8-PAC.new/University_Edition/devpro_v5n1_sparc. 2.Selektieren Sie das gewünschte Produkt und installieren Sie es mit add . Bevor Sie die Compiler benutzen können, müssen Sie noch die Lizenzcodes installieren. Installation der Lizenzcodes (durch License Manager) 1.Voraussetzung. für die Nutzung der Lizenzcodes ist es, daß sich Ihr Rechner in einer DNS (Domain Name System) - Domain. befindet, deren Namen auf uni-stuttgart.de endet. Mit anderen Worten heißt das, daß der Name Ihres Rechners in. anger Form auf uni-stuttgart.de endet. Falls das nicht der Fall ist und Sie das auch nicht so einrichten können (diese Situation dürfte außergewöhnlich sein) schreiben Sie an Nennen Sie dabei den Namen Ihrer DNS - Domain; aus Ihrer Anfrage sollte ersichtlich sein, warum Sie an der Domain uni-stuttgart.de nicht teilnehmen können. In einem solchen Fall müssen wir Ihnen spezielle Lizenzcodes besorgen. 2.Der License Manager befindet sich im Verzeichnis. Sie können die Installation des License Managers mit dem swmtool vornehmen: 3.Wählen Sie jetzt im GUI den License Manager aus, und installieren Sie die Software mit den Button add . 4.Schließen Sie nach der Installation bitte das swmtool und starten Sie den License Manager. 5.Das Starten des License Managers erfolgt mit. /opt/SUNWste/bin/lit. Nach dem Start werden Sie vom License Manager nach der License information gefragt. Das Lizenzfile befindet sich unter. sunswsrv:/general_data/Lizenz/Technisches/sunpro.lic,sp. 6.Falls Sie sunswsrv.rus.uni-stuttgart.de:/general_data unter. /sun_software_server/general_data gemountet haben, geben Sie folgenden Pfad ein: /sun_software_server/general_data/Lizenz/Technisches/sunpro.lic,sp. 7.Bestätigen Sie die Installation mit dem Button install und schließen Sie den License Manager.")
37
7. Patchinstallation

38
Patches von: SunSolve-CDROMs (Wartungsvertrag)
Werner Sinz (RUS): Zeigen SunSolvCD Zeigen “sunswsrv…” (ueber ssh auf zsdjh) Zeigen : mount /sunswsrv…. Zeigen “sunsolv.sun.de” Patches von: SunSolve-CDROMs (Wartungsvertrag) …patches sunswsrv.rus.uni-stuttgart.de:/patches/…
: Zeigen SunSolvCD. Zeigen sunswsrv… (ueber ssh auf zsdjh) Zeigen : mount /sunswsrv…. Zeigen sunsolv.sun.de Patches von: SunSolve-CDROMs (Wartungsvertrag) …patches. sunswsrv.rus.uni-stuttgart.de:/patches/…")
39
Patches über sunswsrv - I
Werner Sinz (RUS): Demo: zsdjh:/etc<18:05-79> ls /sunswsrv/patches/ Patches über sunswsrv - I Über NFS mounten: sunswsrv.rus.uni-stuttgart.de:/patches Dateien / Unterverzeichnisse: Recommended Patches Patch Reports PatchSummary Unbundled_Recommended_list Files (d) Pcfiles (d) bsp:> less /sunswsrv/patches/Solaris8.PatchReport
: Demo: zsdjh:/etc<18:05-79> ls /sunswsrv/patches/ Patches über sunswsrv - I. Über NFS mounten: sunswsrv.rus.uni-stuttgart.de:/patches. Dateien / Unterverzeichnisse: Recommended Patches. Patch Reports. PatchSummary. Unbundled_Recommended_list. Files (d) Pcfiles (d) bsp:> less /sunswsrv/patches/Solaris8.PatchReport.")
40
Patches über sunswsrv - II
Auswählen der Patches (z.B security Patches) READMEs der einzelnen Patches lesen Patchinstall (halbautomatischen Installieren von Patches) Einzelne Patches oder Patchlist oder “manuelle” Patchinstallation Auswaehlen:> less /sunswsrv/patches/Solaris8.PatchReport Readme:> less /sunswsrv/patches/files/ readme Install:> /sunswsrv/patches/patchinstall
 READMEs der einzelnen Patches lesen. Patchinstall. (halbautomatischen Installieren von Patches) Einzelne Patches oder. Patchlist. oder. manuelle Patchinstallation. Auswaehlen:> less /sunswsrv/patches/Solaris8.PatchReport. Readme:> less /sunswsrv/patches/files/ readme. Install:> /sunswsrv/patches/patchinstall.")
41
“Manuelle” Patchinstallation
Patcheinstallation bis Solaris 2.6 Patches mit gzip komprimiert => gunzip installpatch (bei jedem Patch mitgeliefert) backoutpatch (bei jedem Patch mitgeliefert) Patcheinstallation ab Solaris 7 Patches mit zip komprimiert => unzip patchadd patchrm Gunzip ist im patches-Verz. unzip gehoert zum Solaris-Umfang
 backoutpatch (bei jedem Patch mitgeliefert) Patcheinstallation ab Solaris 7. Patches mit zip komprimiert => unzip. patchadd. patchrm. Gunzip ist im patches-Verz. unzip gehoert zum Solaris-Umfang.")
42
patchadd / patchrm Einen Patch installieren:
patchadd [-d] [-u] [-B backout_dir] patch Mehrere Patches installieren: patchadd [-d] [-u] [-B backout_dir] -M patch_dir patch_id... | patch_dir patch_list Auflisten: patchadd –p (alt: showrev –p) Entfernen: patchrm [-f] [-B backout_dir] patch_id
 Entfernen: patchrm [-f] [-B backout_dir] patch_id.")
43
8. Solaris-Dateisysteme

44
Dateisystem-Überblick
Lokale Dateisysteme ufs (default disk-based file system for Solaris) hsfs (CDs) tmpfs (uses swap space) cachefs (NFS or HSFS can be cached) procfs (process file system in memory) Netzwerkdateisysteme NFS (Network File System) DFS (Distributed File System)
 hsfs (CDs) tmpfs (uses swap space) cachefs (NFS or HSFS can be cached) procfs (process file system in memory) Netzwerkdateisysteme. NFS (Network File System) DFS (Distributed File System)")
45
/ - Dateibaum - I /bin /dev /devices /etc /export /home /kernel
/lost+found /mnt /net /opt /proc /sbin /tmp /usr /var > ls -l /

46
/ - Dateibaum - II /bin - Binaries /export - Exportierte Verzeichnisse
Link auf /usr/bin (UNIX-Betriebssystemkommandos) /export - Exportierte Verzeichnisse /home - Benutzer-Heimverzeichnisse Oft auch unter /export/home! /kernel - Kernel und Kernelmodule /lost+found - fsck-Hilfsverzeichnis /mnt - Leeres Verz. Für Mounts
 /export - Exportierte Verzeichnisse. /home - Benutzer-Heimverzeichnisse. Oft auch unter /export/home! /kernel - Kernel und Kernelmodule. /lost+found - fsck-Hilfsverzeichnis. /mnt - Leeres Verz. Für Mounts.")
47
/ - Dateibaum - III /net - Netzverzeichnisse /opt - Optionale Software
/proc - Prozeßinformationen (ps) /sbin - Startup-Binaries Kommandos für die Initialisierungsphase z.B. rc*-Scripts /tmp - Kernel und Kernelmodule
 /sbin - Startup-Binaries. Kommandos für die Initialisierungsphase. z.B. rc*-Scripts. /tmp - Kernel und Kernelmodule.")
48
/dev – logische Gerätenamen
Werner Sinz (RUS): Demo: ls /dev ls /dev/dsk … /dev – logische Gerätenamen Verweis auf die physikalischen Geräte in /devices /dsk - Block-Devices /rdsk - Raw-/ Character-Devices /rmt - Tape-Devices /term - Terminal-Devices /cua - Modems /pts - Pseudo- (Software-)Devices /fbs - Frame-Buffer
: Demo: ls /dev. ls /dev/dsk … /dev – logische Gerätenamen. Verweis auf die physikalischen Geräte in /devices. /dsk - Block-Devices. /rdsk - Raw-/ Character-Devices. /rmt - Tape-Devices. /term - Terminal-Devices. /cua - Modems. /pts - Pseudo- (Software-)Devices. /fbs - Frame-Buffer.")
49
Logische Platten-Devicenamen
Werner Sinz (RUS): - s. Handschuch, S.194, Solaris Device Config. Guide: “Wide-mode EISA adapters can support targets greater than 7 if the proper entries are added to the system configuration files: /kernel/drv/sd.conf (for disk) and /kernel/drv/st.conf (for tape).” Logische Platten-Devicenamen cwtxdysz Bsp: /dev/dsk/c0t0d0s0 LUN (!=0) ggf. in der Treiber-Konfigurationsdatei “/kernel/drv/{sd|st}.conf” konfigurieren! Slice- / Partitionsnummer (0…7) Drive-Nummer (LUN, 0-3) Target-Nummer (SCSI-Adresse, 0-6) Controller-Nummer
: - s. Handschuch, S.194, Solaris Device Config. Guide: Wide-mode EISA adapters can support targets greater than 7 if the proper entries are added to the system configuration files: /kernel/drv/sd.conf (for disk) and /kernel/drv/st.conf (for tape). Logische Platten-Devicenamen. cwtxdysz Bsp: /dev/dsk/c0t0d0s0. LUN (!=0) ggf. in der Treiber-Konfigurationsdatei /kernel/drv/{sd|st}.conf konfigurieren! Slice- / Partitionsnummer (0…7) Drive-Nummer (LUN, 0-3) Target-Nummer (SCSI-Adresse, 0-6) Controller-Nummer.")
50
Logische Tape-Devicenamen
X[Y][b][n] Bsp: /dev/rmt/0hn L=low, m=medium, h=high, u+c = ultra/compressed No-rewind SunOS-4.x-Kompatibilität Denisity (l,m,h,u,c) Laufwerksnummer (0 … 127)
 Laufwerksnummer (0 … 127)")
51
/devices – physikalische Geräte
Werner Sinz (RUS): pseudo-devices = Software-Devices (pts, ...) /devices – physikalische Geräte Aufbau durch: Reconfigure-Boot boot -r Boot mit Datei “reconfigure” im /-Verzeichnis drvconfig zur Laufzeit (link auf devfsadm bei Sol.8) devfsadm (Sol. 8 / Hot-Plug) zur Laufzeit
: pseudo-devices = Software-Devices (pts, ...) /devices – physikalische Geräte. Aufbau durch: Reconfigure-Boot. boot -r. Boot mit Datei reconfigure im /-Verzeichnis. drvconfig zur Laufzeit (link auf devfsadm bei Sol.8) devfsadm (Sol. 8 / Hot-Plug) zur Laufzeit.")
52
Physische-Devicenamen
Demo: > ls –l /devices > prtconf –vp ! SCSI-Controller SBUS-Slot SCSI-Disk SCSI-Adresse 0 Partition 0 (a) ! Hardware-spezifische Adressen !
 ! Hardware-spezifische Adressen !")
53
/etc - Konfigurationsdateien
Konfigurationsdateien (u.a): passwd, group, vfstab, … Konfigurationsverzeichnisse (u.a.): /dfs - dfstab, sharetab, … /cron.d - cron.deny, … /default - Standard-Systemkonfiguration /inet - Netzdateien (hosts, …) /init.d - Startdateien /rc?.d - Startdateien (Link auf init.d) /skel - Dateien für neuen Benutzer
: passwd, group, vfstab, … Konfigurationsverzeichnisse (u.a.): /dfs - dfstab, sharetab, … /cron.d - cron.deny, … /default - Standard-Systemkonfiguration. /inet - Netzdateien (hosts, …) /init.d - Startdateien. /rc .d - Startdateien (Link auf init.d) /skel - Dateien für neuen Benutzer.")
54
/usr - Systemdateien /bin - UNIX-Kommandos
/include - Header-Files für SW-Entwicklung /lib - Libraries /openwin - OpenWindows, X-Kommandos /sadm - SW-Administration /sbin - Systemkommandos /share - Architekturunabhängige Daten /ucb - BSD-Kompatible Binaries

55
/var – variable Systemdateien
/adm - Log-/Accounting-Dateien (messages) /cron - Cron-Logs /ldap - Lightweight Directory Access Protocol /log - syslog /sadm - Software-Administration /spool - Spooling für Mail, Printing, … /yp - NIS-Maps
 /cron - Cron-Logs. /ldap - Lightweight Directory Access Protocol. /log - syslog. /sadm - Software-Administration. /spool - Spooling für Mail, Printing, … /yp - NIS-Maps.")
56
9. Eigene lokale Dateisysteme

57
Erstellen von Dateisystemen
Platte anschliessen => boot –r Platte formatieren => format Platte partitionieren => format Dateisystem anlegen => newfs Dateisystem einhängen => mount Dateisystem prüfen => fsck Statt “boot –r” auch: Boot mit Datei “reconfigure” im /-Verzeichnis drvconfig bzw devfsadm zur Laufzeit

58
Format – FORMAT-MENU disk - select a disk
Werner Sinz (RUS): Demo: Remote auf zsdjh gehen, 2te Platte anschliessen=> formatieren anwaehlen… Abbrechen vor Formatierung, da zu zeitaufwendig! Format – FORMAT-MENU disk select a disk format format and analyze the disk partition - select (define) a partition table label write label to the disk current describe the current disk repair repair a defective sector analyze surface analysis inquiry show vendor, product and revision volname - set 8-character volume name
: Demo: Remote auf zsdjh gehen, 2te Platte anschliessen=> formatieren anwaehlen… Abbrechen vor Formatierung, da zu zeitaufwendig! Format – FORMAT-MENU. disk - select a disk. format - format and analyze the disk. partition - select (define) a partition table. label - write label to the disk. current - describe the current disk. repair - repair a defective sector. analyze - surface analysis. inquiry - show vendor, product and revision. volname - set 8-character volume name.")
59
Format – PARTITION-MENU
change `0' partition change `1' partition change `2' partition change `3' partition change `4' partition change `5' partition change `6' partition change `7' partition print - display the current table label - write partition map and label to the disk quit “label” am Ende nicht vergessen!!

60
Format – Partitionstabelle
Werner Sinz (RUS): Demo: - Slice X anlegen. - Partirion 2 ist ueblicherweise Gesamtplatte (backup) Format – Partitionstabelle partition> pr Part Tag Flag Cylinders Size Blocks root wm GB (891/0/0) swap wu MB (223/0/0) 2 backup wm GB (7506/0/0) var wm GB (891/0/0) 4 unassigned wm MB (223/0/0) 5 unassigned wm (0/0/0) 6 alternates wm GB (1781/0/0) 7 alternates wm GB (3497/0/0)
: Demo: - Slice X anlegen. - Partirion 2 ist ueblicherweise Gesamtplatte (backup) Format – Partitionstabelle. partition> pr. Part Tag Flag Cylinders Size Blocks. 0 root wm GB (891/0/0) swap wu MB (223/0/0) backup wm GB (7506/0/0) var wm GB (891/0/0) unassigned wm MB (223/0/0) unassigned wm 0 0 (0/0/0) 0. 6 alternates wm GB (1781/0/0) alternates wm GB (3497/0/0)")
61
Format – Tags / Flags Tag Flag
A numeric value that usually describes the file system mounted on this partition. 0=UNASSIGNED 1=BOOT 2=ROOT 3=SWAP 4=USR 5=BACKUP 6=STAND 7=VAR 8=HOME 9=ALTERNATES Flag wm Partition is writable and mountable. wu Partition is writable and unmountable. (Default state for swap areas) rm Partition is read only and mountable.
 rm Partition is read only and mountable.")
62
newfs example# newfs -Nv /dev/rdsk/c0t0d0s6
Werner Sinz (RUS): Demo: newfs auf Slice X newfs example# newfs -Nv /dev/rdsk/c0t0d0s6 mkfs -F ufs -o N /dev/rdsk/c0t0d0s 2048 t /dev/rdsk/c0t0d0s6: sectors in 1374 cylinders of 15 tracks, 54 sectors 569.8MB in 86 cyl groups (16 c/g, 6.64MB/g, 3072 i/g) super-block backups (for fsck -b #) at: 32, 13056, 26080, 39104, 52128, 65152, 78176, 91200, , ...
: Demo: newfs auf Slice X. newfs. example# newfs -Nv /dev/rdsk/c0t0d0s6. mkfs -F ufs -o N /dev/rdsk/c0t0d0s t /dev/rdsk/c0t0d0s6: sectors in cylinders of 15 tracks, 54 sectors 569.8MB in 86 cyl. groups (16 c/g, 6.64MB/g, 3072 i/g) super-block backups. (for fsck -b #) at: 32, 13056, 26080, 39104, 52128, 65152, 78176, 91200, , ...")
63
Dateisystem einhängen - I
example# mount /dev/dsk/c0t1d0s6 /scr2 example# df -k Filesystem kbytes used avail capacity Mounted on /dev/dsk/c0t0d0s % / /proc % /proc swap % /tmp sunswsrv.rus.uni-stuttgart.de:/patches % /sunswsrv/patches /dev/dsk/c0t1d0s % /scr2 example# umount /src2

64
Dateisystem einhängen - II
example# vi /etc/vfstab #device device mount FS fsck mount mount #to mount to fsck point type pass at boot options # /proc /proc proc no /dev/dsk/c0t0d0s0 /dev/rdsk/c0t0d0s0 / ufs no /dev/dsk/c0t0d0s swap no swap /tmp tmpfs yes /dev/dsk/c0t1d0s6 /dev/rdsk/c0t1d0s6 /scr2 ufs no example# mountall fsck pass The pass number used by fsck to decide whether to check a file system. When the field contains a dash (-), the file system is not checked. When the field contains a zero, UFS file systems are not checked but non-UFS file systems are checked. When the field contains a value greater than zero, the file system is always checked. All file systems with a value of 1 in this field, are checked one at a time in the order they appear in the vfstab file. When fsck is run on multiple UFS file systems that have fsck pass values greater than one and the preen option (-o p) is used, fsck automatically checks the file systems on different disks in parallel to maximize efficiency. Otherwise, the value of the pass number does not have any effect. The fsck pass field does not explicitly specify the order in which file systems are checked, other than as described above. Mount Options: bg | fg NFS If the first attempt fails, retries in the background (bg) or in the foreground (fg). This option is safe for non-critical vfstab entries. The default is fg. hard | soft Specifies the procedure if the server does not respond. soft indicates that an error is returned. hard indicates that the retry request is continued until the server responds. The default is hard. intr | nointr Specifies whether keyboard interrupts are delivered to a process that is hung while waiting for a response on a hard-mounted file system. The default is intr (interrupts allowed). largefiles | nolargefiles UFS Enables you to create files larger than 2 Gbytes. The largefiles option means that a file system mounted with this option might contain files larger than 2 Gbytes, but it is not a requirement. The default is largefiles. If the nolargefiles option is specified, the file system could not be mounted on a system running Solaris 2.6 or compatible versions. logging | nologging Enables logging for the file system. UFS logging is the process of storing transactions (changes that make up a complete UFS operation) into a log before the transactions are applied to the UFS file system. Logging helps prevent UFS file systems from becoming inconsistent, which means fsck can be bypassed. Bypassing fsck reduces the time to reboot a system if it crashes, or after a system is shutdown uncleanly. The log is allocated from free blocks on the file system, and is sized approximately 1 Mbyte per 1 Gbyte of file system, up to a maximum of 64 Mbytes. The default is nologging. noatime Suppresses access time updates on files, except when they coincide with updates to the ctime or mtime. See stat(2). This option reduces disk activity on file systems where access times are unimportant (for example, a Usenet news spool). The default is normal access time (atime) recording. remount All Changes the mount options associated with an already-mounted file system. This option can generally be used with any option except ro, but what can be changed with this option is dependent on the file system type. retry=n Retries the mount operation when it fails. n is the number of times to retry. ro | rw CacheFS, NFS, PCFS,UFS, S5FS Specifies read/write or read-only. If you do not specify this option, the default is read/write. The default option for HSFS is ro. suid | nosuid CacheFS, HSFS, NFS,S5FS, UFS Allows or disallows setuid execution. The default is to allow setuid execution.
, the file system is not checked. When the field contains a zero, UFS file systems are not checked but non-UFS file systems are checked. When the field contains a. value greater than zero, the file system is always checked. All file systems with a value of 1 in this field, are checked one at a time in the order they appear in the vfstab file. When fsck is run on multiple UFS file systems that have fsck pass values greater than one and the preen option (-o p) is used, fsck automatically checks the file systems on different disks in parallel to maximize efficiency. Otherwise, the value of the pass number does not have any effect. The fsck pass field does not explicitly specify the order in which file systems are checked, other than as described above. Mount Options: bg | fg. NFS. If the first attempt fails, retries in the background (bg) or in the foreground (fg). This. option is safe for non-critical vfstab entries. The default is fg. hard | soft. Specifies the procedure if the server does not respond. soft indicates that an error is. returned. hard indicates that the retry request is continued until the server responds. The. default is hard. intr | nointr. Specifies whether keyboard interrupts are delivered to a process that is hung while. waiting for a response on a hard-mounted file system. The default is intr (interrupts. allowed). largefiles | nolargefiles. UFS. Enables you to create files larger than 2 Gbytes. The largefiles option means that a. file system mounted with this option might contain files larger than 2 Gbytes, but it is not. a requirement. The default is largefiles. If the nolargefiles option is specified, the. file system could not be mounted on a system running Solaris 2.6 or compatible versions. logging | nologging. Enables logging for the file system. UFS logging is the process of storing transactions. (changes that make up a complete UFS operation) into a log before the transactions are. applied to the UFS file system. Logging helps prevent UFS file systems from becoming. inconsistent, which means fsck can be bypassed. Bypassing fsck reduces the time to. reboot a system if it crashes, or after a system is shutdown uncleanly. The log is allocated from free blocks on the file system, and is sized approximately 1. Mbyte per 1 Gbyte of file system, up to a maximum of 64 Mbytes. The default is. nologging. noatime. Suppresses access time updates on files, except when they coincide with updates to the. ctime or mtime. See stat(2). This option reduces disk activity on file systems where. access times are unimportant (for example, a Usenet news spool). The default is normal. access time (atime) recording. remount. All. Changes the mount options associated with an already-mounted file system. This option. can generally be used with any option except ro, but what can be changed with this. option is dependent on the file system type. retry=n. Retries the mount operation when it fails. n is the number of times to retry. ro | rw. CacheFS, NFS, PCFS,UFS, S5FS. Specifies read/write or read-only. If you do not specify this option, the default is. read/write. The default option for HSFS is ro. suid | nosuid. CacheFS, HSFS, NFS,S5FS, UFS. Allows or disallows setuid execution. The default is to allow setuid execution.")
65
Der Automounter (autofs) - I
Automatisches Ein- und Aushängen von Dateisystemen bei Bedarf Lokale und entfernte (NFS-) Dateisysteme Starten: /etc/init.d/autofs start (manuell) /etc/rc2.d/S74autofs (beim booten) Stoppen: /etc/init.d/autofs stop
 Dateisysteme. Starten: /etc/init.d/autofs start (manuell) /etc/rc2.d/S74autofs (beim booten) Stoppen: /etc/init.d/autofs stop.")
66
Der Automounter (autofs) - II
Werner Sinz (RUS): “Ls /etc/auto*” auf zsdjh “cat /etc/auto_master” auf zsdjh /net-Beispiel auf zsdjh Der Automounter (autofs) - II Konfiguration über “automounter-Maps” Master-Map (/etc/auto_master) Direkte Maps “/-” als Kennzeichen in Master-Map Absolute Pfade Indirekte Maps Verzeichnis angegeben in Master-Map Relative Pfade Ausführbare Maps Build-In-Maps (/net)
: Ls /etc/auto* auf zsdjh. cat /etc/auto_master auf zsdjh /net-Beispiel auf zsdjh. Der Automounter (autofs) - II. Konfiguration über automounter-Maps Master-Map (/etc/auto_master) Direkte Maps. /- als Kennzeichen in Master-Map. Absolute Pfade. Indirekte Maps. Verzeichnis angegeben in Master-Map. Relative Pfade. Ausführbare Maps. Build-In-Maps (/net)")
67
Dateisystem prüfen example# umount /dev/dsk/c0t1d0s6
example# fsck /dev/rdsk/c0t1d0s6 ** /dev/rdsk/c0t1d0s6 ** Last Mounted on /scr2 ** Phase 1 - Check Blocks and Sizes ** Phase 2 - Check Pathnames ** Phase 3 - Check Connectivity ** Phase 4 - Check Reference Counts ** Phase 5 - Check Cyl groups 3 files, 9 used, free (13 frags, blocks, 0.0% fragmentation) Fsck sollte auf rdsk, nicht dsk gemacht werden! (rdsk geht auch bei eingehaengten FS (aber Vorsicht! Panic moeglich)).
 Fsck sollte auf rdsk, nicht dsk gemacht werden! (rdsk geht auch bei eingehaengten FS (aber Vorsicht! Panic moeglich)).")
68
Sonstige Dateisystem-Befehle
df - number of free disk blocks and files du - summarize disk usage ff - list file names and statistics of a FS fuser - identify processes using a file sync - Update Filesystem tunefs - tune up an existing file system ff fuer nicht gemountete FS!

69
Auswechselbare Datenträger
eject - eject media such as CD-ROM and floppy example# eject cd fdformat - format floppy / PCMCIA memory card example# fdformat /dev/diskette mt - magnetic tape control example# mt -f /dev/rmt/0 status fdformat - format floppy diskette or PCMCIA memory card fdformat [ -dDeEfHlLmMUqvx ] [ -b label ] [ -B filename ] [ -t dostype ] [ devname ] mt - magnetic tape control mt [ -f tapename ] command... [ count ] eject - eject media such as CD-ROM and floppy from drive eject [ -dfnpq ] [ device|nickname ] eject –n (nicknames) fd -> floppy0 fd0 -> floppy0 fd1 -> floppy1 diskette -> floppy0 diskette0 -> floppy0 diskette1 -> floppy1 rdiskette -> floppy0 rdiskette0 -> floppy0 rdiskette1 -> floppy1 cd -> cdrom0
 fd -> floppy0. fd0 -> floppy0. fd1 -> floppy1. diskette -> floppy0. diskette0 -> floppy0. diskette1 -> floppy1. rdiskette -> floppy0. rdiskette0 -> floppy0. rdiskette1 -> floppy1. cd -> cdrom0.")
70
Volume-Management /etc/init.d/volmgt start
Werner Sinz (RUS): Automatisches Erkennen und Einhaengen von Datentraegern Beispiel fuer Notwendigkeit des editierens von vold.conf: Bei PC-Karte durfte floppy NICHT unter vold-Kontrolle sein, sonst Konnte nicht vom PC drauf zugegriffen werden!! Vold-Prozess ueberwacht dann die Medien. Vold benutzt das Kommando “rrmount” removable media mount Volume-Management /etc/init.d/volmgt start volcheck - check entpr. /etc/vold.conf /etc/init.d/volmgt stop Bei “manuellem” Umgang mit Datenträgern. Sonst Fehlermeldung “device busy” Automatisches Erkennen und Einhaengen von Datentraegern Vold-Prozess ueberwacht die Medien. Vold benutzt das Kommando “rrmount” removable media mount Beispiel fuer Notwendigkeit des Editierens von vold.conf: Bei SUN PC-Karte darf die Floppy NICHT unter vold-Kontrolle sein, sonst kann nicht vom PC darauf zugegriffen werden!!
: Automatisches Erkennen und Einhaengen von Datentraegern. Beispiel fuer Notwendigkeit des editierens von vold.conf: Bei PC-Karte durfte floppy NICHT unter vold-Kontrolle sein, sonst. Konnte nicht vom PC drauf zugegriffen werden!! Vold-Prozess ueberwacht dann die Medien. Vold benutzt das Kommando rrmount removable media mount. Volume-Management. /etc/init.d/volmgt start. volcheck - check entpr. /etc/vold.conf. /etc/init.d/volmgt stop. Bei manuellem Umgang mit Datenträgern. Sonst Fehlermeldung device busy Automatisches Erkennen und Einhaengen von Datentraegern. Vold-Prozess ueberwacht die Medien. Vold benutzt das Kommando rrmount removable media mount. Beispiel fuer Notwendigkeit des Editierens von vold.conf: Bei SUN PC-Karte darf die Floppy NICHT unter vold-Kontrolle sein, sonst kann nicht vom PC darauf zugegriffen werden!!")
71
Swap Ueberprüfen: Hinzufügen: Entfernen: example# swap -s
example# mkfile -v 32m /swap2fs Example# swap -a /swap2fs (Ggf. in /etc/vfstab: /swap2fs swap - no -) Entfernen: Example# swap -d /swap2fs example # rm /swap2fs // Swap-File löschen bsp> swap -s total: 81216k bytes allocated k reserved = 90656k used, 48048k available
 Entfernen: Example# swap -d /swap2fs. example # rm /swap2fs // Swap-File löschen. bsp> swap -s. total: 81216k bytes allocated k reserved = 90656k used, 48048k available.")
72
10. Network File System (NFS)
")
73
Network File System (NFS)
NFS-Server NFS-Client(s) /root-Verzeichnis /root-Verzeichnis /... /export /home /alfons /berta /caecilie /dora /... /home /alfons /berta /caecilie /dora NFS-Mount # share /export/home # mount NFS-Server:/export/home /home
 /root-Verzeichnis. /root-Verzeichnis. /... /export. /home. /alfons. /berta. /caecilie. /dora. /... /home. /alfons. /berta. /caecilie. /dora. NFS-Mount. # share /export/home. # mount NFS-Server:/export/home. /home.")
74
Vorteile von NFS Konsistenter Zugriff mehrerer Rechner auf die gleichen Dateien Transparent fuer den Benutzer Heterogene Umgebungen Reduziert Administrationsaufwand Reduziert Plattenkosten

75
NFS-Dateisysteme exportieren - I
share [-F FSType] [-o options] [-d descr] [ pathname] -o ro|rw|root[=access_list] wobei access-list: [-]client[:[-]client]... [-]netgroup[:[-]netgroup]... [-].domain name suffix[:[-].domain name suffix] Beispiel: “share -F nfs -o /disk”

76
NFS-Dateisysteme exportieren - II
share [-F FSType] [-o options] [-d descr] [ pathname] -o anon=uid (uid für unbekannte Benutzer) -o log=tag (tag ist definiert in /etc/nfs/nfslog.conf) -o nosub (keine Mounts von Unterverzeichnissen) -o nosuid (setuid, setgid verboten)
 -o log=tag (tag ist definiert in /etc/nfs/nfslog.conf) -o nosub (keine Mounts von Unterverzeichnissen) -o nosuid (setuid, setgid verboten)")
77
NFS-Dateisysteme exportieren - III
unshare [pathname] shareall [-F FSType [,FSType ...]] [ -| file ] unshareall [-F FSType [,FSType ...]] /etc/dfs/dfstab - Default-Datei für [un]shareall - enthält share-Befehle - Autom. Ausführung in run-level 3

78
NFS-Dateisysteme testen
share showmount [-a] [-d] [-e] [host] dfmounts [host] dfshares [host] nfsstat [-cnrsmza] mount [ -p | -v ] (auf dem Client)
")
79
NFS-Dateisysteme importieren - I
Manuelles Ein- / Abhängen einzelner Dateisysteme: mount [–r] <server>:<pfad> <Mountpunkt> umount [–f] <Mountpunkt> Manuelles Ein- / Abhängen über vfstab: mountall [ -F FSType ] [ -l | -r ] umountall [ -k ] [ [ -h host ] | [ -F FSType ] [ -l | -r ] ]

80
NFS-Dateisysteme importieren - II
example# vi /etc/vfstab #device device mount FS fsck mount mount #to mount to fsck point type pass at boot options # /dev/dsk/c0t0d0s0 /dev/rdsk/c0t0d0s0 / ufs no /proc /proc proc no /dev/dsk/c0t0d0s swap no swap /tmp tmpfs yes appl-b:/raid /appl/raid nfs yes rw,hard,timeo=50, \ bg,nosuid,largefiles example# mountall

81
NFS-Dateisysteme importieren - III
Einhaengen beim Booten: über /etc/vfstab Autom. Einhängen bei Bedarf: Automounter (autofs)
")
82
NFS starten / stoppen NFS-Server starten (für Export)
Manuell: “/etc/init.d/nfs.server {start | stop}” Beim Booten: Start in rc3.d, (Nur wenn dfstab vorhanden!) Stop in rc{0,1,S}.d NFS-Client Prozesse starten Manuell: “/etc/init.d/nfs.client {start | stop}” Beim Booten: Start in rc2.d, Stop in rc0.d
 Stop in rc{0,1,S}.d. NFS-Client Prozesse starten. Manuell: /etc/init.d/nfs.client {start | stop} Beim Booten: Start in rc2.d, Stop in rc0.d.")
83
NFS - Prozesse NFS-Server Prozesse:
nfsd Bearbeiten der Client-Anfragen (mehrf.) mountd Einhängen loker Dateisysteme (nfslogd) (nur bei Dateisystemen mit log-Option) rpcbind (gestartet von: /etc/init.d/rpc) NFS-Client Prozesse (laufen auch auf Server): lockd Locking von Dateien / Dateisätzen statd Statusverarbeitung für Wiederanlauf nach Crash
 mountd Einhängen loker Dateisysteme. (nfslogd) (nur bei Dateisystemen mit log-Option) rpcbind (gestartet von: /etc/init.d/rpc) NFS-Client Prozesse (laufen auch auf Server): lockd Locking von Dateien / Dateisätzen. statd Statusverarbeitung für Wiederanlauf nach Crash.")
84
Das chachfs – Dateisystem - I
Werner Sinz (RUS): Auf spinett wird bei jedem reboot das cachefs geloescht und neu gemacht! spinett:~<17:25-59> less /etc/rc2.d/S73cachefs #!/bin/sh # cache_opts="-o maxfilesize=20" if [ -d /Cache/NFS ]; then echo "Deleting cache filesystem /Cache/NFS ..." /usr/bin/mv /Cache/NFS /Cache/NFS.old /usr/sbin/cfsadmin -d all /Cache/NFS.old & fi if [ -d /Cache ]; then echo "Creating a new cache filesystem in /Cache/NFS ..." /usr/sbin/cfsadmin -c $cache_opts /Cache/NFS Das chachfs – Dateisystem - I Vorteile: Schnellerer Zugriff auf langsame Dateisysteme (NFS) Reduzierung der Netzwerkbelastung (bei NFS) Tipps: Nur häufig verwendete Dateisysteme cachen (homes) cachefs auf mögl. unbelasteter Platte (eigene Partition) AnswerBook2 · System Administration Guide, Volume I: Um Probleme zu vermeiden kann es sinnvoll sein, das cachefs bei jedem Reboot neu zu initialisieren. Beispielprozedur: bsp > cat /etc/rc2.d/S73cachefs #!/bin/sh # cache_opts="-o maxfilesize=20" if [ -d /Cache/NFS ]; then echo "Deleting cache filesystem /Cache/NFS ..." /usr/bin/mv /Cache/NFS /Cache/NFS.old /usr/sbin/cfsadmin -d all /Cache/NFS.old & fi if [ -d /Cache ]; then echo "Creating a new cache filesystem in /Cache/NFS ..." /usr/sbin/cfsadmin -c $cache_opts /Cache/NFS
: Auf spinett wird bei jedem reboot das cachefs geloescht und neu gemacht! spinett:~<17:25-59> less /etc/rc2.d/S73cachefs. #!/bin/sh. # cache_opts= -o maxfilesize=20 if [ -d /Cache/NFS ]; then. echo Deleting cache filesystem /Cache/NFS ... /usr/bin/mv /Cache/NFS /Cache/NFS.old. /usr/sbin/cfsadmin -d all /Cache/NFS.old & fi. if [ -d /Cache ]; then. echo Creating a new cache filesystem in /Cache/NFS ... /usr/sbin/cfsadmin -c $cache_opts /Cache/NFS. Das chachfs – Dateisystem - I. Vorteile: Schnellerer Zugriff auf langsame Dateisysteme (NFS) Reduzierung der Netzwerkbelastung (bei NFS) Tipps: Nur häufig verwendete Dateisysteme cachen (homes) cachefs auf mögl. unbelasteter Platte (eigene Partition) AnswerBook2 · System Administration Guide, Volume I: Um Probleme zu vermeiden kann es sinnvoll sein, das cachefs bei jedem Reboot neu zu initialisieren. Beispielprozedur: bsp > cat /etc/rc2.d/S73cachefs. #!/bin/sh. # cache_opts= -o maxfilesize=20 if [ -d /Cache/NFS ]; then. echo Deleting cache filesystem /Cache/NFS ... /usr/bin/mv /Cache/NFS /Cache/NFS.old. /usr/sbin/cfsadmin -d all /Cache/NFS.old & fi. if [ -d /Cache ]; then. echo Creating a new cache filesystem in /Cache/NFS ... /usr/sbin/cfsadmin -c $cache_opts /Cache/NFS.")
85
Das chachfs – Dateisystem – II
Werner Sinz (RUS): Eine Demo im Browser vorbereiten: The following example creates a cache directory named /cache: # cfsadmin -c /cache # mount -F cachefs -o backfstype=nfs,cachedir=/cache :/usr/local/system /mnt1 # mount -F cachefs -o backfstype=nfs,cachedir=/cache :/export/home/sinz /mnt3 Listing the contents of a cache directory: # cfsadmin -l /cache cfsadmin: list cache FS information maxblocks % minblocks % threshblocks 85% maxfiles % minfiles % threshfiles 85% maxfilesize 3MB :_usr_local_system:_mnt1 :_export_home_sinz:_mnt3 Displays statistical information: # cachefsstat How to Specify Consistency Checking on Demand: # mount -F cachefs -o backfstype=nfs,cachedir=/directory,demandconst server:/file-system /mount-point ============ # cfsadmin -s /mount-point How to Delete a Cached File System: # umount mount-point # cfsadmin -d cache-id cache-directory cache-id aus # cfsadmin -l cache-directory) example# cfsadmin -d :_usr_local_system:_mnt1 /cache Examples-Deleting a Cached File System: cfsadmin -d all /local/mycache Das chachfs – Dateisystem – II Anwendung read write (around) The following example creates a cache directory named /cache: # cfsadmin -c /cache # mount -F cachefs -o backfstype=nfs,cachedir=/cache :/usr/local/system /mnt1 # mount -F cachefs -o backfstype=nfs,cachedir=/cache :/export/home/sinz /mnt3 Listing the contents of a cache directory: # cfsadmin -l /cache cfsadmin: list cache FS information maxblocks % minblocks % threshblocks 85% maxfiles % minfiles % threshfiles 85% maxfilesize 3MB :_usr_local_system:_mnt1 :_export_home_sinz:_mnt3 Displays statistical information: # cachefsstat How to Specify Consistency Checking on Demand: # mount -F cachefs -o backfstype=nfs,cachedir=/directory,demandconst server:/file-system /mount-point (demandconst – Option beim mount beachten!) # cfsadmin -s /mount-point How to Delete a Cached File System: # umount mount-point # cfsadmin -d cache-id cache-directory (cache-id aus # cfsadmin -l cache-directory) example# cfsadmin -d :_usr_local_system:_mnt1 /cache Examples-Deleting a Cached File System: cfsadmin -d all /local/mycache cachefs lokal entfernt Netzwerk NFS read write
: Eine Demo im Browser vorbereiten: The following example creates a cache directory named /cache: # cfsadmin -c /cache. # mount -F cachefs -o backfstype=nfs,cachedir=/cache :/usr/local/system /mnt1. # mount -F cachefs -o backfstype=nfs,cachedir=/cache :/export/home/sinz /mnt3. Listing the contents of a cache directory: # cfsadmin -l /cache. cfsadmin: list cache FS information. maxblocks 90% minblocks 0% threshblocks 85% maxfiles 90% minfiles 0% threshfiles 85% maxfilesize 3MB :_usr_local_system:_mnt :_export_home_sinz:_mnt3. Displays statistical information: # cachefsstat. How to Specify Consistency Checking on Demand: # mount -F cachefs -o backfstype=nfs,cachedir=/directory,demandconst server:/file-system /mount-point. ============ # cfsadmin -s /mount-point. How to Delete a Cached File System: # umount mount-point. # cfsadmin -d cache-id cache-directory. cache-id aus # cfsadmin -l cache-directory) example# cfsadmin -d :_usr_local_system:_mnt1 /cache. Examples-Deleting a Cached File System: cfsadmin -d all /local/mycache. Das chachfs – Dateisystem – II. Anwendung. read. write (around) The following example creates a cache directory named /cache: # cfsadmin -c /cache. # mount -F cachefs -o backfstype=nfs,cachedir=/cache :/usr/local/system /mnt1. # mount -F cachefs -o backfstype=nfs,cachedir=/cache :/export/home/sinz /mnt3. Listing the contents of a cache directory: # cfsadmin -l /cache. cfsadmin: list cache FS information. maxblocks 90% minblocks 0% threshblocks 85% maxfiles 90% minfiles 0% threshfiles 85% maxfilesize 3MB :_usr_local_system:_mnt :_export_home_sinz:_mnt3. Displays statistical information: # cachefsstat. How to Specify Consistency Checking on Demand: # mount -F cachefs -o backfstype=nfs,cachedir=/directory,demandconst server:/file-system /mount-point. (demandconst – Option beim mount beachten!) # cfsadmin -s /mount-point. How to Delete a Cached File System: # umount mount-point. # cfsadmin -d cache-id cache-directory. (cache-id aus # cfsadmin -l cache-directory) example# cfsadmin -d :_usr_local_system:_mnt1 /cache. Examples-Deleting a Cached File System: cfsadmin -d all /local/mycache. cachefs. lokal. entfernt. Netzwerk. NFS. read. write.")
86
chachfs – Verwaltung - I
Anlegen cfsadmin -c [ -o cacheFS-parameters ] cache_directory Beispiel: # cfsadmin -c /cache Benutzen mount –F cachefs [generic_options] –o backfstype=nfs, cachedir=dir [specific_options] [-O] mount_point # mount -F cachefs -o backfstype=nfs,cachedir=/cache,demandconst :/raid /raid The cfsadmin command provides the following functions: cache creation deletion of cached file systems listing of cache contents and statistics resource parameter adjustment when the file system is unmounted. Optionen von cfsadmin: cacheFS-parameters: s. “man cachefs” maxblocks, minblocks, threshblocks, maxfiles, minfiles, threshfiles, maxfilesize generic options: s. “man mount” -m, -g, -o, -O, -r specific_options: s. “man mount_cachefs” acdirmax=n, acdirmin=n, acregmax=n, acregmin=n, actimeo=n, backpath=path, cachedir=directory, cacheid=ID, demandconst, local-access, noconst, purge, ro | rw, suid | nosuid, write-around | non-shared

87
chachfs – Verwaltung – II
Testen cfsadmin -l cache_directory - List file systems + statistics cachefsstat - Cache File System statistics Warten/Pflegen cachefspack [ -i| -p| -u] [-f pack-list] [-U cache-dir] [file]... Prüfen der Konsistenz cfsadmin -s {mntpt1 ....} | all geht nur, wenn mit der Option “demandconst” gemountet. cachefspack-Optionen -f packing-list Specify a file containing a list of files and directories to be packed. -h Help. Print a brief summary of all the options. -i View information about the packed files. -p Pack the file or files specified by file. This is the default behavior. -u Unpack the file or files specified by file. -U cache-directory Unpack all files in the specified cache directory.

88
chachfs – Verwaltung - III
Löschen cfsadmin -d {cache_ID | all} cache_directory Beispiel: # umount /raid # cfsadmin -d modsrv01.modus.uni-stuttgart.de:_raid:_raid /cache (cache-id aus # cfsadmin -l cache-directory)
")
89
NFS - Literatur Verwaltung von Unix- Netzwerken mit NFS und NIS. (Hal Stern) Taschenbuch (1995) OReilly/VVA; ISBN: Preis: DM 69,00 Linux-/Windows Integration mit NFS:

90
11. Network Information Service (NIS)
")
91
Verzeichnisdienste ? Beispiel: Telefonauskunft Anfrage Antwort
NIS ist ein Verzeichnisdienst, der in einem lokalen Netz, die auf einem zentralen Server (NIS-Server) liegenden Verwaltungsdateien (z.B. /etc/passwd, /etc/group, ...) einer festzulegenden Gruppe von Rechnern (=NIS-Domain) zur Verfuegung stellt. Anfrage ? Antwort
 liegenden Verwaltungsdateien (z.B. /etc/passwd, /etc/group, ...) einer festzulegenden Gruppe von Rechnern (=NIS-Domain) zur Verfuegung stellt. Anfrage. Antwort.")
92
Arten von Verzeichnisdiensten
Globale Verzeichnisdienste DNS X500 / LDAP Lokale Verzeichnisdienste NIS (YP) NIS+ /etc - Dateien
 NIS+ /etc - Dateien.")
93
Auswahl von Verzeichnisdiensten
Werner Sinz (RUS): + kann nur fuer passwd und group verwendet werden. Vorteil: Netgruppen oder einzelne User koennen angegeben werden. (Bei Eingabe “nis” wird die ganze NIS-Map durchsucht! Auswahl von Verzeichnisdiensten Syntax von /etc/nsswitch.conf <database>: [files] [nis] [nisplus] [dns] [ldap] ... Beispiel# cat /etc/nsswitch.conf passwd: compat - beachte “+” Eintrag in /etc/passwd group: files nis - kein “+” Eintrag in /etc/group # hosts: dns nis files networks: nis [NOTFOUND=return] files - "files" only if nis is down protocols: nis [NOTFOUND=return] files - "files" only if nis is down Interaction with +/- syntax Releases prior to SunOS 5.0 did not have the name service switch but did allow the user some policy control. In /etc/passwd one could have entries of the form +user (include the specified user from NIS passwd.byname), -user (exclude the specified user) and + (include everything, except excluded users, from NIS passwd.byname).
: + kann nur fuer passwd und group verwendet werden. Vorteil: Netgruppen oder einzelne User koennen angegeben werden. (Bei Eingabe nis wird die ganze NIS-Map durchsucht! Auswahl von Verzeichnisdiensten. Syntax von /etc/nsswitch.conf. <database>: [files] [nis] [nisplus] [dns] [ldap] ... Beispiel# cat /etc/nsswitch.conf. passwd: compat - beachte + Eintrag in /etc/passwd. group: files nis - kein + Eintrag in /etc/group. # hosts: dns nis files. networks: nis [NOTFOUND=return] files - files only if nis is down. protocols: nis [NOTFOUND=return] files - files only if nis is down. Interaction with +/- syntax. Releases prior to SunOS 5.0 did not have the name service. switch but did allow the user some policy control. In. /etc/passwd one could have entries of the form +user. (include the specified user from NIS passwd.byname), -user. (exclude the specified user) and + (include everything, except excluded users, from NIS passwd.byname).")
94
NIS – Verzeichnisdienste (Maps)
bootparams ethers.byaddr ethers.byname group.bygid group.byname hosts.byaddr hosts.byname mail.aliases mail.byaddr netgroup.byhost netgroup.byuser netgroup netid.byname netmasks.byaddr networks.byaddr networks.byname passwd.adjunct. byname passwd.byname passwd.byuid protocols.byname\ protocols.bynumber rpc.bynumber services.byname services.byservice ypservers A default set of NIS maps are provided for you. You may want to use all these maps or only some of them. NIS can also use whatever maps you create or add when you install other software products. Default-NIS-Maps: bootparams Contains path names of files clients need during boot: root, swap, possibly others. ethers.byaddr Contains machine names and Ethernet addresses. The Ethernet address is the key in the map. ethers.byname Same as ethers.byaddr, except the key is machine name instead of the Ethernet address. group.bygid Contains group security information with group ID as key. group.byname Contains group security information with group name as key. hosts.byaddr Contains machine name, and IP address, with IP address as key. hosts.byname Contains machine name and IP address, with machine (host) name as key. mail.aliases Contains aliases and mail addresses, with aliases as key. mail.byaddr Contains mail address and alias, with mail address as key. netgroup.byhost Contains group name, user name and machine name. netgroup.byuser Same as netgroup.byhost, except that key is user name. netgroup Same as netgroup.byhost, except that key is group name. netid.byname Used for UNIX-style authentication. Contains machine name and mail address (including domain name). If there is a netid file available it is consulted in addition to the data available through the other files. netmasks.byaddr Contains network mask to be used with IP submitting, with the address as the key. networks.byaddr Contains names of networks known to your system and their IP addresses, with the address as the key. networks.byname Same as networks.byaddr, except key is name of network. passwd.adjunct. byname Contains auditing information and the hidden password information for C2 clients. passwd.byname Contains password information with user name as key. passwd.byuid Same as passwd.byname, except that key is user ID. protocols.byname Contains network protocols known to your network. protocols.bynumber Same as protocols.byname, except that key is protocol number. rpc.bynumber Contains program number and name of RPCs known to your system. Key is RPC program number. services.byname Lists Internet services known to your network. Key is port or protocol. services.byservice Lists Internet services known to your network. Key is service name. ypservers Lists NIS servers known to your network.
 name as key. mail.aliases Contains aliases and mail addresses, with aliases as key. mail.byaddr Contains mail address and alias, with mail address as key. netgroup.byhost Contains group name, user name and machine name. netgroup.byuser Same as netgroup.byhost, except that key is user name. netgroup Same as netgroup.byhost, except that key is group name. netid.byname Used for UNIX-style authentication. Contains machine name and mail address. (including domain name). If there is a netid file available it is consulted in addition. to the data available through the other files. netmasks.byaddr Contains network mask to be used with IP submitting, with the address as the key. networks.byaddr Contains names of networks known to your system and their IP addresses, with the address as the key. networks.byname Same as networks.byaddr, except key is name of network. passwd.adjunct. byname Contains auditing information and the hidden password information for C2 clients. passwd.byname Contains password information with user name as key. passwd.byuid Same as passwd.byname, except that key is user ID. protocols.byname Contains network protocols known to your network. protocols.bynumber Same as protocols.byname, except that key is protocol number. rpc.bynumber Contains program number and name of RPCs known to your system. Key is RPC program number. services.byname Lists Internet services known to your network. Key is port or protocol. services.byservice Lists Internet services known to your network. Key is service name. ypservers Lists NIS servers known to your network.")
95
NIS – Architektur NIS-Domäne: “hell” NIS-Domäne: “dunkel”
Master-Server Master-Server Map- Transfer Map- Transfer Map- Transfer NIS Master-Servers: The machine designated as master server contains the set of maps that you, the NIS administrator, create and update as necessary. Each NIS domain must have one, and only one, master server. NIS Slave-Servers: You can designate additional NIS servers in the domain as slave servers. A slave server has a complete copy of the master set of NIS maps. Whenever the master server maps are updated, the updates are propagated among the slave servers. The existence of slave servers allows the system administrator to evenly distribute the load resulting from answering NIS requests. It also minimizes the impact of a server becoming unavailable. Normal practice is to designate one master server for all NIS maps. However, because each individual NIS map has the machine name of the master server encoded within it, you could designate different servers to act as master and slave servers for different maps. Note, however, that randomly designating a server as master of one map and another server as master of another map can cause a great deal of administrative confusion. For that reason it is best to have a single server be the master for all the maps you create within a single domain. NIS Clients NIS clients run processes that request data from maps on the servers. Clients do not make a distinction between master and slave servers, since all NIS servers should have the same information. NIS servers are also clients, typically though not necessarily, of themselves. For information on how to create NIS clients, refer to the ypbind man page. NIS Domain An NIS domain is a collection of machines that share a common set of NIS maps. Each domain has a domain name and each machine sharing the common set of maps belongs to that domain. Domain names are case-sensitive. Any machine can belong to a given domain, as long as there is a server for that domain's maps in the same network. Solaris Release 2 machines do not require the server to be on the same subnet A NIS client machine obtains its domain name and binds to a NIS server as part of its boot process. Slave-Server Slave-Server Slave-Server NIS-Requests NIS-Requests NIS-Requests Client Client Client Client Client Client Client Client Client

96
NIS - Installation NIS als Nameservice bei Solaris-Installation auswählen Nachträglich installieren: SUNWypr root-Teile von YP SUNWypu usr-Teile von YP Beispiel: # cd /sunswsrv/cdrom_copies/Solaris_8/sol_8_sparc_2/Solaris_8/Product # pkgadd –d . # ... auswählen von SUNWypr und SUNWypu Installation von “sunswsrv” (RUS) mit pkgadd: bsp# pkgadd -d /sunswsrv/cdrom_copies/Solaris_8/sol_8_sparc_2/Solaris_8/Product The following packages are available: 139 SUNWypr NIS Server for Solaris (root) (sparc) ,REV= 140 SUNWypu NIS Server for Solaris (usr) ... Select package(s) you wish to process (or 'all' to process all packages). (default: all) [?,??,q]: 139 Installation von “sunswsrv” (RUS) mit swmtool: bsp# swmtool -d /sunswsrv/cdrom_copies/Solaris_8/sol_8_sparc_2/Solaris_8/Product Auswaehlen von: NIS Server for Solaris (root) NIS Server for Solaris (usr)
 mit pkgadd: bsp# pkgadd -d /sunswsrv/cdrom_copies/Solaris_8/sol_8_sparc_2/Solaris_8/Product. The following packages are available: SUNWypr NIS Server for Solaris (root) (sparc) ,REV= SUNWypu NIS Server for Solaris (usr) ... Select package(s) you wish to process (or all to process. all packages). (default: all) [ , ,q]: 139. Installation von sunswsrv (RUS) mit swmtool: bsp# swmtool -d /sunswsrv/cdrom_copies/Solaris_8/sol_8_sparc_2/Solaris_8/Product. Auswaehlen von: NIS Server for Solaris (root) NIS Server for Solaris (usr)")
97
Dateien, Verz. auf NIS-Master
Installation: /var/yp/Makefile Map-Generierung /var/yp/binding/ ypservers /usr/bin/... NIS-Befehle /usr/lib/netsvc/yp/... spez. NIS-Befehle Konfiguration: /var/yp/<domain>/... Maps /var/yp/<source>/... Quell-Dateien /etc/defaultdomain Domänenname

98
NIS - Konfiguration Planung der NIS-Domäne Master-Server vorbereiten
Master-Server konfigurieren NIS-Prozesse auf Master-Server starten Slave-Server konfigurieren NIS-Klienten konfigurieren

99
Planung der NIS-Domäne
Festlegung des Domänennamens Max. 256 Zeichen Festlegung der Master-Server Üblich: 1 Master-Server / Domäne Möglich: 1 Master-Server / Map Festlegung der Slave-Server Bestimmung der Klienten Planning the Domain Decide which machines will be in your NIS domain(s). A NIS domain does not have to be congruent with your network. A network can have more than one NIS domain, and there can be machines on your network that are outside of your NIS domain(s). Choose a NIS domain name. A NIS domain name can be up to 256 characters long, though much shorter names are more practical. A good practice is to limit domain names to no more than 32 characters. Domain names are case-sensitive. For convenience, you can use your Internet domain name as the basis for your NIS domain name. For example, if your Internet domain name is doc.com, you can name your NIS domain doc.com. If you wanted to divide doc.com into two NIS domains, one for the sales department and the other for the manufacturing department, you could name one sales.doc.com and the other manf.doc.com. Before a machine can use NIS services, the correct NIS domain name and machine name must be set. A machine's name is set by the machine's /etc/nodename file and the machine's domain name is set by the machine's /etc/defaultdomain file. These files are read at boot time and the contents are used by the uname -S and domainname commands, respectively. (Diskless machines read these files from their boot server.) Identify Your NIS Servers Decide which machines will be NIS servers. Select one machine to be the master server (you can always change this at a later date). Decide which machines, if any, will be slave servers. (See Solaris Naming Administration Guide for a general overview of NIS and NIS requirements.) Identify Your NIS Client Machines Decide which machines will be NIS clients. Typically all machines in your domain are set to be NIS clients, although this is not strictly necessary.
. A NIS domain does not have to be congruent with your network. A network can have more than one NIS domain, and there can be machines on your network that are outside of your NIS domain(s). Choose a NIS domain name. A NIS domain name can be up to 256 characters long, though much shorter names are more practical. A good practice is to limit domain names to no more than 32 characters. Domain names are case-sensitive. For convenience, you can use your Internet domain name as the basis for your NIS domain name. For example, if your Internet domain name is doc.com, you can name your NIS domain doc.com. If you wanted to divide doc.com into two NIS domains, one for the sales department and the other for the manufacturing department, you could name one sales.doc.com and the other manf.doc.com. Before a machine can use NIS services, the correct NIS domain name and machine name must be set. A machine s name is set by the machine s /etc/nodename file and the machine s domain name is set by the machine s /etc/defaultdomain file. These files are read at boot time and the contents are used by the uname -S and domainname commands, respectively. (Diskless machines read these files from their boot server.) Identify Your NIS Servers. Decide which machines will be NIS servers. Select one machine to be the master server (you can always change this at a later date). Decide which machines, if any, will be slave servers. (See Solaris Naming Administration Guide for a general overview of NIS and NIS requirements.) Identify Your NIS Client Machines. Decide which machines will be NIS clients. Typically all machines in your domain are set to be NIS clients, although this is not strictly necessary.")
100
Master-Server vorbereiten - I
Domäne setzen # domainname <my-domain> # domainname > /etc/defaultdomain Pfad zu “make” gesetzt? # set path=($path /usr/ccs/bin) Verzeichnis für Quelldateien anlegen ($DIR) # mkdir /var/yp/<src> Verzeichnis für Kennwortdatei anlegen ($PWDIR) # mkdir /var/yp/<pwdir>
 Verzeichnis für Quelldateien anlegen ($DIR) # mkdir /var/yp/<src> Verzeichnis für Kennwortdatei anlegen ($PWDIR) # mkdir /var/yp/<pwdir>")
101
Master-Server vorbereiten - II
Quelldateien für Map-Konvertierung vorbereiten Kopiere Quelldateien -> $DIR (NICHT /etc/mail/aliases) Kopiere /etc/passwd, /etc/shadow -> $PWDIR Kommentare, ... aus Quelldateien entfernen Makefile anpassen DIR= /var/yp/<src> PWDIR= /var/yp/<pwdir> all: passwd group ... gewünschte Maps eintragen Neueinträge für eigene (nicht-standard) Maps Makefile unter /var/yp: # #pragma ident /02/14 SMI" ... DIR =/var/yp/src PWDIR =/var/yp/src DOM = `domainname` NOPUSH = "" ALIASES = /etc/mail/aliases YPDIR=/usr/lib/netsvc/yp SBINDIR=/usr/sbin YPDBDIR=/var/yp YPPUSH=$(YPDIR)/yppush MAKEDBM=$(SBINDIR)/makedbm all: passwd group #all: passwd group hosts ipnodes ethers networks rpc services protocols \ # netgroup bootparams aliases publickey netid netmasks c2secure \ # timezone auto.master auto.home \ # auth.attr exec.attr prof.attr user.attr audit.user group.time: $(DIR)/group @(awk 'BEGIN { FS=":"; OFS="\t"; } /^[a-zA-Z0-9_]/ { print $$1, $$0 }' $(DIR)/group $(CHKPIPE))| $(MAKEDBM) - $(YPDBDIR)/$(DOM)/group.byname; @(awk 'BEGIN { FS=":"; OFS="\t"; } /^[a-zA-Z0-9_]/ { printf("%-10d ", $$3); print $$0 }' $(DIR)/group $(CHKPIPE)) | $(MAKEDBM) - $(YPDBDIR)/$(DOM)/group.bygid; @touch group.time; @echo "updated group"; @if [ ! $(NOPUSH) ]; then $(YPPUSH) -d $(DOM) group.byname; fi @if [ ! $(NOPUSH) ]; then $(YPPUSH) -d $(DOM) group.bygid; fi @if [ ! $(NOPUSH) ]; then echo "pushed group"; fi .... passwd: passwd.time group: group.time project: project.time hosts: hosts.time
 Kopiere /etc/passwd, /etc/shadow -> $PWDIR. Kommentare, ... aus Quelldateien entfernen. Makefile anpassen. DIR= /var/yp/<src> PWDIR= /var/yp/<pwdir> all: passwd group ... gewünschte Maps eintragen. Neueinträge für eigene (nicht-standard) Maps. Makefile unter /var/yp: # #pragma /02/14 SMI ... DIR =/var/yp/src. PWDIR =/var/yp/src. DOM = `domainname` NOPUSH = ALIASES = /etc/mail/aliases. YPDIR=/usr/lib/netsvc/yp. SBINDIR=/usr/sbin. YPDBDIR=/var/yp. YPPUSH=$(YPDIR)/yppush. MAKEDBM=$(SBINDIR)/makedbm. all: passwd group. #all: passwd group hosts ipnodes ethers networks rpc services protocols \ # netgroup bootparams aliases publickey netid netmasks c2secure \ # timezone auto.master auto.home \ # auth.attr exec.attr prof.attr user.attr audit.user. group.time: BEGIN { FS= : ; OFS= \t ; } /^[a-zA-Z0-9_]/ { print $$1, $$0 } $(DIR)/group $(CHKPIPE))| $(MAKEDBM) - BEGIN { FS= : ; OFS= \t ; } /^[a-zA-Z0-9_]/ { printf( %-10d , $$3); print $$0 } $(DIR)/group $(CHKPIPE)) | $(MAKEDBM) - updated group [ ! $(NOPUSH) ]; then $(YPPUSH) -d $(DOM) group.byname; [ ! $(NOPUSH) ]; then $(YPPUSH) -d $(DOM) group.bygid; [ ! $(NOPUSH) ]; then echo pushed group ; fi passwd: passwd.time. group: group.time. project: project.time. hosts: hosts.time.")
102
passwd-Map mit shadow nsswitch.conf - Eintrag: Kopieren der Originale:
Nachteil: Zwei Dateien zu pflegen! nsswitch.conf - Eintrag: “passwd compat” oder “passwd files nis” Kopieren der Originale: cp /etc/passwd $PWDIR cp /etc/shadow $PWDIR Bereinigen der Kopien lokale Einträge (root!) entfernen Eintrag NIS-Verweis (bei “compat”) “+” in /etc/passwd, /etc/shadow nsswitch.conf - Eintrag: bsp> cat /etc/nsswitch.conf passwd: compat group: files nis hosts: files dns nis networks: nis [NOTFOUND=return] files protocols: nis [NOTFOUND=return] files ... Vorteil “compat”-Eintrag: Netzgruppen bsp> cat /etc/passwd root:x:0:1:Super-User:/:/sbin/sh daemon:x:1:1::/: +adsm:x:::::
 entfernen. Eintrag NIS-Verweis (bei compat ) + in /etc/passwd, /etc/shadow. nsswitch.conf - Eintrag: bsp> cat /etc/nsswitch.conf. passwd: compat. group: files nis. hosts: files dns nis. networks: nis [NOTFOUND=return] files. protocols: nis [NOTFOUND=return] files. ... Vorteil compat -Eintrag: Netzgruppen. bsp> cat /etc/passwd. root:x:0:1:Super-User:/:/sbin/sh. daemon:x:1:1::/: +adsm:x:::::")
103
passwd-Map ohne shadow
nsswitch.conf - Eintrag: “passwd compat” oder “passwd files nis” Konvertieren der Originale: > cut -d: -f1,2 /etc/shadow > /tmp/eins > cut -d: -f3- /etc/passwd > /tmp/zwei > paste -d: /tmp/eins /tmp/zwei > $PWDIR/passwd Bereinigen der Kopien lokale Einträge (root!) entfernen Eintrag NIS-Verweis (bei “compat”) “+” in /etc/passwd, /etc/shadow $PWDIR/passwd: bsp> cat /var/yp/src/passwd yptest2:xfJmQr/g7K0zc:108:100:yptest:/export/home/yptest:/usr/local/bin/tcsh yptest3:wFzskwfnhKiUQ:109:100:yptest3:/export/home/yptest:/usr/local/bin/tcsh
 entfernen. Eintrag NIS-Verweis (bei compat ) + in /etc/passwd, /etc/shadow. $PWDIR/passwd: bsp> cat /var/yp/src/passwd. yptest2:xfJmQr/g7K0zc:108:100:yptest:/export/home/yptest:/usr/local/bin/tcsh. yptest3:wFzskwfnhKiUQ:109:100:yptest3:/export/home/yptest:/usr/local/bin/tcsh.")
104
Master-Server konfigurieren
Nameservice=lokal setzen (nsswitch.conf: “files”) Slaveserver in /etc/hosts eintragen /usr/sbin/ypinit –m Slaveserver? terminate at nonfatal error? destroy existing files in the /var/yp/<domainname>? => Ruft “make” auf Nameservice=nis setzen (nsswitch.conf: “... nis”) How to Set Up the Master Server With ypinit The /usr/sbin/ypinit shell script sets up master and slave servers and clients to use NIS. It also initially runs make to create the maps on the master server. To use ypinit to build a fresh set of NIS maps on the master server, follow these steps: 1.Become root on the master server and ensure that the name service gets its information from the /etc files, not from NIS, by typing: # cp /etc/nsswitch.files /etc/nsswitch.conf 2.Edit the /etc/hosts or /etc/inet/ipnodes file to add the name and IP address of each of the NIS servers. 3.To build new maps on the master server, type: # /usr/sbin/ypinit -m 4.ypinit prompts for a list of other machines to become NIS slave servers. Type the name of the server you are working on, along with the names of your NIS slave servers. 5.ypinit asks whether you want the procedure to terminate at the first nonfatal error or continue despite nonfatal errors. Type y. When you choose y, ypinit exits upon encountering the first problem; you can then fix it and restart ypinit. This is recommended if you are running ypinit for the first time. If you prefer to continue, you can try to manually fix all problems that occur, and then restart ypinit. 6.ypinit asks whether the existing files in the /var/yp/domainname directory can be destroyed. This message is displayed only if NIS has been previously installed. You must answer yes to install the new version of NIS. 7.After ypinit has constructed the list of servers, it invokes make. # make This program uses the instructions contained in the Makefile (either the default one or the one you modified) located in /var/yp. The make command cleans any remaining comment lines from the files you designated and runs makedbm on them, creating the appropriate maps and establishing the name of the master server for each map. If the map or maps being pushed by the Makefile correspond to a domain other than the one returned by the command domainname on the master, you can make sure that they are pushed to the correct domain by starting make in the ypinit shell script with a proper identification of the variable DOM, as follows: # make DOM=domainname password This pushes the password map to the intended domain, instead of the domain to which the master belongs. 8.To enable NIS as the naming service, type: # cp /etc/nsswitch.nis /etc/nsswitch.conf This replaces the current switch file with the default NIS-oriented switch file. You can edit this file as necessary.
 Slaveserver in /etc/hosts eintragen. /usr/sbin/ypinit –m. Slaveserver terminate at nonfatal error destroy existing files in the /var/yp/<domainname> => Ruft make auf. Nameservice=nis setzen (nsswitch.conf: ... nis ) How to Set Up the Master Server With ypinit. The /usr/sbin/ypinit shell script sets up master and slave servers and clients to use NIS. It also initially runs make to create the maps on the master server. To use ypinit to build a fresh set of NIS maps on the master server, follow these steps: 1.Become root on the master server and ensure that the name service gets its information from the /etc files, not from NIS, by typing: # cp /etc/nsswitch.files /etc/nsswitch.conf. 2.Edit the /etc/hosts or /etc/inet/ipnodes file to add the name and IP address of each of the NIS servers. 3.To build new maps on the master server, type: # /usr/sbin/ypinit -m. 4.ypinit prompts for a list of other machines to become NIS slave servers. Type the name of the server you are working on, along with the names of your NIS slave servers. 5.ypinit asks whether you want the procedure to terminate at the first nonfatal error or continue despite nonfatal errors. Type y. When you choose y, ypinit exits upon encountering the first problem; you can then fix it and restart ypinit. This is recommended if you are running ypinit for the first time. If you prefer to continue, you can try to manually fix all problems that occur, and then restart ypinit. 6.ypinit asks whether the existing files in the /var/yp/domainname directory can be destroyed. This message is displayed only if NIS has been previously installed. You must answer yes to install the new version of NIS. 7.After ypinit has constructed the list of servers, it invokes make. # make. This program uses the instructions contained in the Makefile (either the default one or the one you modified) located in /var/yp. The make command cleans any remaining comment lines from the files you designated and runs makedbm on them, creating the appropriate maps and establishing the name of the master server for each map. If the map or maps being pushed by the Makefile correspond to a domain other than the one returned by the command domainname on the master, you can make sure that they are pushed to the correct domain by starting make in the ypinit shell script with a proper identification of the variable DOM, as follows: # make DOM=domainname password. This pushes the password map to the intended domain, instead of the domain to which the master belongs. 8.To enable NIS as the naming service, type: # cp /etc/nsswitch.nis /etc/nsswitch.conf. This replaces the current switch file with the default NIS-oriented switch file. You can edit this file as necessary.")
105
Master-Server starten/stoppen
Automatisch beim Booten / Shutdown: /etc/init.d/rpc [start | stop] Aus Befehlszeile: /usr/lib/netsvc/yp/ypstart /usr/lib/netsvc/yp/ypstop

106
NIS-Prozesse ypupdated - changing NIS information (MS)
yppasswdd - modifying NIS password file (MS) ypxfrd - NIS Transfer Daemon (MS) ypserv - NIS Server (S) ypbind - NIS binder process (C/S) > ps -ef | grep yp root Apr 03 ? :00 /usr/lib/netsvc/yp/rpc.ypupdated root Apr 03 ? :00 /usr/lib/netsvc/yp/ypserv -d root Apr 03 ? :00 /usr/lib/netsvc/yp/ypbind root Apr 03 ? :00 /usr/lib/netsvc/yp/ypxfrd root Apr 03 ? :00 /usr/lib/netsvc/yp/rpc.yppasswdd
 ypxfrd - NIS Transfer Daemon (MS) ypserv - NIS Server (S) ypbind - NIS binder process (C/S) > ps -ef | grep yp. root Apr 03 0:00 /usr/lib/netsvc/yp/rpc.ypupdated. root Apr 03 0:00 /usr/lib/netsvc/yp/ypserv -d. root Apr 03 0:00 /usr/lib/netsvc/yp/ypbind. root Apr 03 0:00 /usr/lib/netsvc/yp/ypxfrd. root Apr 03 0:00 /usr/lib/netsvc/yp/rpc.yppasswdd.")
107
Änderungen der NIS-Quelldateien
Editieren der Quelldateien im YP-Verzeichnis: bsp# vi /var/yp/src/passwd Maps neu generieren (nach jeder Änderung!): bsp# cd /var/yp bsp# make [map] > make updated passwd pushed passwd updated group pushed group >
: bsp# cd /var/yp. bsp# make [map] > make. updated passwd. pushed passwd. updated group. pushed group. >")
108
Slave-Server konfigurieren
Domäne setzen # domainname <my-domain> # domainname > /etc/defaultdomain NIS-Server in /etc/hosts eintragen Client initialisieren /usr/sbin/ypinit –c NIS-Restart /usr/lib/netsvc/yp/ypstop; /usr/lib/netsvc/yp/ypstart /usr/sbin/ypinit –s <master-server> How to Set Up a Slave Server Now you are ready to create a new slave server, as follows: 1.As root, edit the /etc/hosts or /etc/inet/ipnodes file on the slave server to add the name and IP addresses of all the other NIS servers. 2.Change directory to /var/yp on the slave server. 3.To initialize the slave server as a client, type the following: # /usr/sbin/ypinit -c The ypinit command prompts you for a list of NIS servers. Enter the name of the local slave you are working on first, then the master server, followed by the other NIS slave servers in your domain in order from the physically closest to the furthest (in network terms). You must first configure the new slave server as an NIS client so that it can get the NIS maps from the master for the first time. (See Setting Up NIS Clients for details.) 4.To determine if ypbind is running, type: # ps -ef | grep ypbind If a listing is displayed, ypbind is running. 5.If ypbind is running, stop it by typing: # /usr/lib/netsvc/yp/ypstop 6.Type the following to restart ypbind: # /usr/lib/netsvc/yp/ypstart 7.To initialize this machine as a slave, type the following: # /usr/sbin/ypinit -s master Where master is the machine name of the existing NIS master server. Repeat the procedures described in this section for each machine you want configured as an NIS slave server. Starting NIS Service on a Slave Server Now you can start daemons on the slave server and begin NIS service. All existing yp processes must be stopped, by typing: To start ypserv on the slave server and run ypbind, type: Alternatively, you can reboot the slave server and daemons will be started automatically.
. You must first configure the new slave server as an NIS client so that it can get the NIS maps from the master for the first time. (See Setting Up NIS Clients for details.) 4.To determine if ypbind is running, type: # ps -ef | grep ypbind. If a listing is displayed, ypbind is running. 5.If ypbind is running, stop it by typing: # /usr/lib/netsvc/yp/ypstop. 6.Type the following to restart ypbind: # /usr/lib/netsvc/yp/ypstart. 7.To initialize this machine as a slave, type the following: # /usr/sbin/ypinit -s master. Where master is the machine name of the existing NIS master server. Repeat the procedures described in this section for each machine you want configured as an NIS slave server. Starting NIS Service on a Slave Server. Now you can start daemons on the slave server and begin NIS service. All existing yp processes must be stopped, by typing: To start ypserv on the slave server and run ypbind, type: Alternatively, you can reboot the slave server and daemons will be started automatically.")
109
Slave-Server synchronisieren
Manuell yppoll <map> ypxfr [options] <map> Cron (SUN-Standard-Scripts in /usr/lib/netsvc/yp) ypxfr_1perday* ypxfr_1perhour* /ypxfr_2perday Synchronisation Ist einer der Slave-Server nicht aktiv, während der Master-Server die Maps (bei Änerungen) an die Slave-Server verteilt, so ist die Datenbank des inaktiven Slave-Servers nicht mehr mit der des Masters identisch. Der Slave-Server muss daher, sobald er wieder aktiv ist die aktuellen Maps anfordern! Standardscripts von SUN zur Synchronisation ueber Cron: #! /bin/sh # ypxfr_1perday.sh - Do daily NIS map check/updates # PATH=/bin:/usr/bin:/usr/lib/netsvc/yp:$PATH export PATH # set -xv ypxfr group.byname ypxfr group.bygid ypxfr protocols.byname ypxfr protocols.bynumber ypxfr networks.byname ypxfr networks.byaddr ypxfr services.byname ypxfr ypservers # ypxfr_1perhour.sh - Do hourly NIS map check/updates ypxfr passwd.byname ypxfr passwd.byuid # ypxfr_2perday.sh - Do twice-daily NIS map check/updates ypxfr hosts.byname ypxfr hosts.byaddr ypxfr ethers.byaddr ypxfr ethers.byname ypxfr netgroup ypxfr netgroup.byuser ypxfr netgroup.byhost ypxfr mail.aliases
 ypxfr_1perday* ypxfr_1perhour* /ypxfr_2perday. Synchronisation. Ist einer der Slave-Server nicht aktiv, während der Master-Server die Maps (bei Änerungen) an die Slave-Server verteilt, so ist die Datenbank des inaktiven Slave-Servers nicht mehr mit der des Masters identisch. Der Slave-Server muss daher, sobald er wieder aktiv ist die aktuellen Maps anfordern! Standardscripts von SUN zur Synchronisation ueber Cron: #! /bin/sh. # ypxfr_1perday.sh - Do daily NIS map check/updates. # PATH=/bin:/usr/bin:/usr/lib/netsvc/yp:$PATH. export PATH. # set -xv. ypxfr group.byname. ypxfr group.bygid. ypxfr protocols.byname. ypxfr protocols.bynumber. ypxfr networks.byname. ypxfr networks.byaddr. ypxfr services.byname. ypxfr ypservers. # ypxfr_1perhour.sh - Do hourly NIS map check/updates. ypxfr passwd.byname. ypxfr passwd.byuid. # ypxfr_2perday.sh - Do twice-daily NIS map check/updates. ypxfr hosts.byname. ypxfr hosts.byaddr. ypxfr ethers.byaddr. ypxfr ethers.byname. ypxfr netgroup. ypxfr netgroup.byuser. ypxfr netgroup.byhost. ypxfr mail.aliases.")
110
NIS-Klienten konfigurieren
Domäne setzen # domainname <my-domain> # domainname > /etc/defaultdomain NIS als Nameservice auswählen nsswitch.conf ypinit –c Liste der Server eingeben. (Wird in “/var/yp/binding/<domain>/ypservers” gespeichert) Achtung: NIS-Client wartet beim Booten bis sich ein NIS-Server meldet!! Setting Up NIS Clients You must perform two tasks to allow a machine to use NIS: Select the correct nsswitch.conf file. Configure the machine to use NIS, as explained below. Configuring a Machine to Use NIS The two methods for configuring a machine to use NIS as its name service are explained below. ypinit. The recommended method for configuring a client machine to use NIS is to login to the machine as root and run ypinit -c. # ypinit -c You will be asked to name NIS servers from which the client obtains name service information. You can list as many master or slave servers as you want. The servers that you list can be located anywhere in the domain. It is a better practice to first list the servers closest (in net terms) to the machine, than those that are on more distant parts of the net. Broadcast method. An older method of configuring a client machine to use NIS to log in to the machine as root, set the domain name with the domainname command, then run ypbind. # domainname doc.com # ypbind -broadcast When you run ypbind, it searches the local subnet for an NIS server. If it finds one, it binds to it. This search is referred to as broadcasting. If there is no NIS server on the client's local subnet, it fails to bind and the client machine is not able to obtain namespace data from the NIS service.
 Achtung: NIS-Client wartet beim Booten bis sich ein NIS-Server meldet!! Setting Up NIS Clients. You must perform two tasks to allow a machine to use NIS: Select the correct nsswitch.conf file. Configure the machine to use NIS, as explained below. Configuring a Machine to Use NIS. The two methods for configuring a machine to use NIS as its name service are explained below. ypinit. The recommended method for configuring a client machine to use NIS is to login to the machine as root and run ypinit -c. # ypinit -c. You will be asked to name NIS servers from which the client obtains name service information. You can list as many master or slave servers as you want. The. servers that you list can be located anywhere in the domain. It is a better practice to first list the servers closest (in net terms) to the machine, than those that are on. more distant parts of the net. Broadcast method. An older method of configuring a client machine to use NIS to log in to the machine as root, set the domain name with the. domainname command, then run ypbind. # domainname doc.com. # ypbind -broadcast. When you run ypbind, it searches the local subnet for an NIS server. If it finds one, it binds to it. This search is referred to as broadcasting. If there is no NIS. server on the client s local subnet, it fails to bind and the client machine is not able to obtain namespace data from the NIS service.")
111
NIS-Befehle ypcat - NIS-Maps ausgeben
ypwhich - Name des NIS server ausgeben domainname - anzeigen/setzen akt. domainname ypset - NIS-Server setzen ypcat [ -kx ] [ -d ypdomain ] map ypwhich [ -d domain ] [ [ -t ] -m [ mname ] | [ -Vn ] hostname ] ypwhich -x domainname [ name-of-domain ] /usr/sbin/ypset [ -d ypdomain ] [ -h host ] server bsp> ypcat -x Use "passwd" for map "passwd.byname" Use "group" for map "group.byname" Use "networks" for map "networks.byaddr" Use "hosts" for map "hosts.byname" Use "protocols" for map "protocols.bynumber" Use "services" for map "services.byname" Use "aliases" for map "mail.aliases" Use "ethers" for map "ethers.byname" Use "ipnodes" for map "ipnodes.byname" Use "project" for map "project.byname" bsp> ypwhich admin bsp> domainname sinz.rus bsp> ypset admin ypset: Sorry, ypbind on host localhost has rejected your request. Die Funktion ist nur erlaubt, wenn beim Start von ypbind die Option “-ypset”, bzw. “ypsetme” gesetzt wurde! ypbind wird in “/usr/lib/netsvc/yp/ypstart” gestartet: # start ypbind if [ -x $YPDIR/ypbind ]; then if [ -d $YPSRV -a -f $YPSRV/ypservers ]; then $YPDIR/ypbind –ypsetme > /dev/null 2>&1 echo " ypbind\c" elif [ -d $YPSRV ]; then $YPDIR/ypbind -broadcast > /dev/null 2>&1 fi # do a ypwhich to force ypbind to get bound ypwhich > /dev/null 2>&1 SYNOPSIS: /usr/lib/netsvc/yp/ypbind [ -broadcast | -ypset | -ypsetme] OPTIONS -broadcast Send a broadcast datagram using UDP/IP that requests the information needed to bind to a specific NIS server. This option is analogous to ypbind with no options in earlier Sun releases and is recommended for ease of use. -ypset Allow users from any remote machine to change the binding by means of the ypset command. By default, no one can change the binding. This option is insecure. -ypsetme Only allow root on the local machine to change the binding to a desired server by means of the ypset com- mand. ypbind can verify the caller is indeed a root user by accepting such requests only on the loopback transport. By default, no external process can change the binding.

112
12. Benutzerverwaltung

113
Kommandos und Dateien Dateien/Verzeichnisse /etc/passwd /etc/shadow
/etc/group /etc/skel dot-Files Kommandos user{add | mod | del} group{add | mod | del} passwd

114
/etc/passwd root : x 1 Super-User / /sbin/sh 2 3 4 5 6 7
1 Super-User / /sbin/sh 2 3 4 5 6 7 [1] Benutzername [2] Platzhalter für Kennwort (/etc/shadow) [3] UID [4] GID [5] Kommentar [6] Heimverzeichnis [7] Benutzershell (muß in /etc/shells eingetragen sein!) Previous releases used a password entry beginning with a `+' (plus sign) or `-' (minus sign) to selectively incorporate entries from NIS maps for password. If still required, this is supported by specifying ``passwd : compat'' in nsswitch.conf(4). The "compat" source may not be supported in future releases.
 [3] UID. [4] GID. [5] Kommentar. [6] Heimverzeichnis. [7] Benutzershell (muß in /etc/shells eingetragen sein!) Previous releases used a password entry beginning with a `+ (plus sign) or `- (minus sign) to selectively incorporate. entries from NIS maps for password. If still required, this. is supported by specifying ``passwd : compat in. nsswitch.conf(4). The compat source may not be supported. in future releases.")
115
/etc/shadow root : 7sCkol9HVx 11031 1 2 3 4 5 6 7 8 9 [1] Benutzername
[2] Verschlüsseltes Kennwort [3] Letzte Änderung des Kennworts (Tage seit ) [4] minimale Zeit für unverändertes Kennwort [5] maximale Zeit Tage der Kennwortgültigkeit [6] Zeit vor Benutzerwarnung des Ablaufs [7] Zeit für Accountsperrung bei Nichtbenutzung [8] Account-Verfallsdatum [9] - ungenutzt -
![/etc/shadow root : 7sCkol9HVx [1] Benutzername](http://slideplayer.org/slide/645315/1/images/115/%2Fetc%2Fshadow+root+%3A+7sCkol9HVx+%5B1%5D+Benutzername.jpg "[2] Verschlüsseltes Kennwort. [3] Letzte Änderung des Kennworts (Tage seit ) [4] minimale Zeit für unverändertes Kennwort. [5] maximale Zeit Tage der Kennwortgültigkeit. [6] Zeit vor Benutzerwarnung des Ablaufs. [7] Zeit für Accountsperrung bei Nichtbenutzung. [8] Account-Verfallsdatum. [9] - ungenutzt -")
116
/etc/group [1] Gruppenname [2] Kennwort [3] GID [4] Gruppenmitglieder
bspgroup : 4711 anna,otto 1 2 3 4 [1] Gruppenname [2] Kennwort [3] GID [4] Gruppenmitglieder
![/etc/group [1] Gruppenname [2] Kennwort [3] GID [4] Gruppenmitglieder](http://slideplayer.org/slide/645315/1/images/116/%2Fetc%2Fgroup+%5B1%5D+Gruppenname+%5B2%5D+Kennwort+%5B3%5D+GID+%5B4%5D+Gruppenmitglieder.jpg "bspgroup. : anna,otto [1] Gruppenname. [2] Kennwort. [3] GID. [4] Gruppenmitglieder.")
117
NIS-Benutzer/Gruppen
Mehr Benutzer und Gruppen (von NIS) => Eintrag in /etc/nsswitch.conf: passwd: compat => Eintrag “+” erlaubt group: files nis
 => Eintrag in /etc/nsswitch.conf: passwd: compat => Eintrag + erlaubt. group: files nis.")
118
/etc/skel Initialdateien des Benutzers
Werden beim Anlegen ins Heimverzeichnis kopiert Solaris-Standarddateien (Installation) local.cshrc, local.login, local.profile Weitere dot-Files: .logout, .Xdefaults, .kshrc, .rhosts, .xinitrc, .project, … Und Verzeichnisse: .dt, … Verz /etc/skel erweitern …
 local.cshrc, local.login, local.profile. Weitere dot-Files: .logout, .Xdefaults, .kshrc, .rhosts, .xinitrc, .project, … Und Verzeichnisse: .dt, … Verz /etc/skel erweitern …")
119
Benutzer Anlegen Ändern Löschen
useradd [-c comment] [-d dir] [-e expire] [-f inactive] [-g group] [ -G group [ , group...]] [ -m [-k skel_dir]] [ -u uid [-o]] [-s shell] login example# useradd -c "O. Muster" -d /home/muster -g 77 -u 66 -m -s /bin/csh muster Ändern usermod [ -u uid [-o]] [-g group] [ -G group [ , group...]] [ -d dir [-m]] [-s shell] [-c comment] [-l new_name] [-f inactive] [-e expire] login Löschen userdel [-r] login

120
Gruppen Anlegen Ändern Löschen groupadd [ -g gid [-o]]
groupmod [ -g gid [-o]] [-n name] Löschen groupdel group
![Gruppen Anlegen Ändern Löschen groupadd [ -g gid [-o]]](http://slideplayer.org/slide/645315/1/images/120/Gruppen+Anlegen+%C3%84ndern+L%C3%B6schen+groupadd+%5B+-g+gid+%5B-o%5D%5D.jpg "groupmod [ -g gid [-o]] [-n name] Löschen. groupdel group.")
121
passwd Repository (-r) Lokale passwd-Datei (-r files)
passwd [ -r files| -r ldap| -r nis| -r nisplus] [name] Lokale passwd-Datei (-r files) passwd [ -r files] [-egh] [name] passwd [ -r files] -s [-a] passwd [ -r files] -s [name] passwd [ -r files] [ -d| -l] [-f] [-n min] [-w warn] [-x max] name /etc/nsswitch.conf Wird untersucht um Standard-Repository festzulegen Bsp: passwd: compat (==> files nis) passwd - r Specifies the repository to which an operation is applied. The supported repositories are files, ldap, nis, or nisplus. -e Changes the login shell. For the files repository, this only works for the super-user. Normal users may change the ldap, nis, or nisplus repositories. The choice of shell is limited by the requirements of getusershell(3C). If the user currently has a shell that is not allowed by getusershell, only root may change it. -g Changes the gecos (finger) information. For the files repository, this only works for the superuser. -h Changes the home directory. -D domainname Consults the passwd.org_dir table in domainname. If this option is not specified, the default domainname returned by nis_local_directory(3NSL) will be used. This domain name is the same as that returned by domainname(1M). -s name Shows password attributes for the login name. For the nisplus repository, this works for everyone. However for the files repository, this only works for the superuser. It does not work at all for the nis repository which does not support password aging. -a Shows password attributes for all entries. Use only with the -s option; name must not be provided. For the nisplus repository, this will show only the entries in the NIS+ password table in the local domain that the invoker is authorized to "read". For the files repository, this is restricted to the superuser.
 passwd [ -r files] [-egh] [name] passwd [ -r files] -s [-a] passwd [ -r files] -s [name] passwd [ -r files] [ -d| -l] [-f] [-n min] [-w warn] [-x max] name. /etc/nsswitch.conf. Wird untersucht um Standard-Repository festzulegen. Bsp: passwd: compat (==> files nis) passwd. - r. Specifies the repository to which an operation is applied. The supported repositories are files, ldap, nis, or nisplus. -e. Changes the login shell. For the files repository, this only works for the super-user. Normal users may change the ldap, nis, or nisplus repositories. The choice of shell is limited by the requirements of getusershell(3C). If the user currently has a shell that is not allowed by getusershell, only root may. change it. -g. Changes the gecos (finger) information. For the files repository, this only works for the superuser. -h. Changes the home directory. -D domainname. Consults the passwd.org_dir table in domainname. If this option is not specified, the default domainname returned by nis_local_directory(3NSL) will. be used. This domain name is the same as that returned by domainname(1M). -s name. Shows password attributes for the login name. For the nisplus repository, this works for everyone. However for the files repository, this only works. for the superuser. It does not work at all for the nis repository which does not support password aging. -a. Shows password attributes for all entries. Use only with the -s option; name must not be provided. For the nisplus repository, this will show only the. entries in the NIS+ password table in the local domain that the invoker is authorized to read . For the files repository, this is restricted to the superuser.")
122
Disk-Quotas - I Dateisystem für Quotas konfigurieren
rq als mount-option in /etc/vfstab setzen # touch quotas (im obersten Verz. des Dateisystems) # chmod 600 quotas Quotas für einzelnen Benutzer setzen # edquota username “fs /home1 blocks (soft = 50, hard = 90) inodes (soft = 0, hard = 0)” Quotas für mehrere Benutzer setzen # edquota -p bob mary john bsp> cat /etc/vfstab #device device mount FS fsck mount mount #to mount to fsck point type pass at boot options # ... /dev/dsk/c1t5d0s /dev/rdsk/c1t5d0s /export/home_ ufs yes rq /dev/dsk/c1t5d0s /dev/rdsk/c1t5d0s /export/home_ ufs yes rq /dev/dsk/c1t5d0s /dev/rdsk/c1t5d0s /export/home_ ufs yes rq
 # chmod 600 quotas. Quotas für einzelnen Benutzer setzen. # edquota username. fs /home1 blocks (soft = 50, hard = 90) inodes (soft = 0, hard = 0) Quotas für mehrere Benutzer setzen. # edquota -p bob mary john. bsp> cat /etc/vfstab. #device device mount FS fsck mount mount. #to mount to fsck point type pass at boot options. # ... /dev/dsk/c1t5d0s5 /dev/rdsk/c1t5d0s5 /export/home_01 ufs 2 yes rq. /dev/dsk/c1t5d0s6 /dev/rdsk/c1t5d0s6 /export/home_02 ufs 3 yes rq. /dev/dsk/c1t5d0s7 /dev/rdsk/c1t5d0s7 /export/home_03 ufs 4 yes rq.")
123
Disk-Quotas - II Konsistenzprüfung Quotas aktivieren
# quotacheck [-v] -a | filesystem Quotas aktivieren # quotaon [-v] -a | filesystem ... Quotas deaktivieren quotaoff [-v] -a | filesystem ... Quotas für Benutzer anzeigen quota [ -v ] [ username ] Quotas für Datesystem anzeigen repquota [-v] –a | filesystem ... # quota -v gustav Disk quotas for gustav (uid 19464): Filesystem usage quota limit timeleft files quota limit timeleft /export/home_ # repquota /export/home_15 Block limits File limits User used soft hard timeleft used soft hard timeleft friedrich wilhelm gustav
: Filesystem usage quota limit timeleft files quota limit timeleft. /export/home_ # repquota /export/home_15. Block limits File limits. User used soft hard timeleft used soft hard timeleft. friedrich wilhelm gustav")
124
13. Netzwerkverwaltung

125
Netzwerkkonfiguration – I
/etc/nodename Hostname eintragen /etc/hostname.interface Hostname oder IP-Adr. eintragen /etc/defaultrouter Name oder IP-Adr. des Default-Routers eintragen /etc/hosts Name und IP-Adr. des Hosts und des Default-Routers eintragen /etc/netmasks Netzmaske eintragen (reboot) Die Daten können von der Installation noch richtig gesetzt sein !! Durch Reboot wird Interface ueber Startup-Routine konfiguriert. Siehe /etc/rcS.d/S30rootusr.sh, bzw: /sbin/rcS (wird von inittab fuer jeden runlevel ausgefuehrt) /etc/defaultrouter: Name nur, wenn IP-Adr ind /etc/hosts! Ifconfig schaut in /etc/hosts nach ip-Adr., wenn Name angegeben wurde
 Die Daten können von der. Installation noch richtig gesetzt sein !! Durch Reboot wird Interface ueber Startup-Routine konfiguriert. Siehe /etc/rcS.d/S30rootusr.sh, bzw: /sbin/rcS (wird von inittab fuer jeden runlevel ausgefuehrt) /etc/defaultrouter: Name nur, wenn IP-Adr ind /etc/hosts! Ifconfig schaut in /etc/hosts nach ip-Adr., wenn Name angegeben wurde.")
126
Netzwerkkonfiguration – II
ifconfig – (Interface-Konfig. ohne reboot) ex# ifconfig hme0 inet netmask broadcast up route add – (Default-Router angeben) ex# route add default > ifconfig -a lo0: flags= <UP,LOOPBACK,RUNNING,MULTICAST,IPv4> mtu 8232 index 1 inet netmask ff000000 hme0: flags= <UP,BROADCAST,RUNNING,MULTICAST,IPv4> mtu 1500 index 2 inet netmask ffff0000 broadcast Routing: Each network interface installs a routing table entry when it is initialized. bsp# route get route to: destination: default mask: default gateway: router.biss.BelWue.DE interface: hme0 flags: <UP,GATEWAY,DONE,STATIC> recvpipe sendpipe ssthresh rtt,ms rttvar,ms hopcount mtu expire
 ex# ifconfig hme0 inet netmask broadcast up. route add – (Default-Router angeben) ex# route add default > ifconfig -a. lo0: flags= <UP,LOOPBACK,RUNNING,MULTICAST,IPv4> mtu 8232 index 1. inet netmask ff hme0: flags= <UP,BROADCAST,RUNNING,MULTICAST,IPv4> mtu 1500 index 2. inet netmask ffff0000 broadcast Routing: Each network interface installs a routing table entry when it is initialized. bsp# route get route to: destination: default. mask: default. gateway: router.biss.BelWue.DE. interface: hme0. flags: <UP,GATEWAY,DONE,STATIC> recvpipe sendpipe ssthresh rtt,ms rttvar,ms hopcount mtu expire")
127
Internet services daemon - inetd
inetd startet weitere Daemons bei Bedarf Vorteile Diese Daemons belegen nicht ständig Speicherplatz Man kann sehr leicht tcpwrapper einsetzen Nachteile Daemon muß bei jeder neuen Verbindung neu gestartet werden Initialisierung des Daemons kann lange dauern Der inetd wird über /etc/inetd.conf konfiguriert.

128
/etc/inetd.conf # inetd.conf This file describes the services that will be available # through the INETD TCP/IP super server. To re-configure # the running INETD process, edit this file, then send the # INETD process a SIGHUP signal. # These are standard services. ftp stream tcp nowait root /usr/sbin/tcpd in.ftpd -l -a telnet stream tcp nowait root /usr/sbin/tcpd in.telnetd # # Pop and imap mail services pop-2 stream tcp nowait root /usr/sbin/tcpd ipop2d pop-3 stream tcp nowait root /usr/sbin/tcpd ipop3d imap stream tcp nowait root /usr/sbin/tcpd imapd … service-name: The name of a valid service listed in the services file. > cat /etc/services ... ftp-data /tcp ftp 21/tcp telnet /tcp

129
/etc/services #ident "@(#)services 1.16 97/05/12 SMI" /* SVr4.0 1.8 */
# Network services, Internet style Echo 7/tcp echo /udp ... ftp /tcp telnet 23/tcp smtp /tcp mail pop /tcp pop # Post Office Protocol - V2 pop /tcp # Post Office Protocol - Version 3 pop /tcp # Post Office imap /tcp imap # Internet Mail Access Protocol v2

130
Weitere Konigurationsdateien
/etc/ethers - Ethernet address to hostname database ex# cat /etc/ethers cc:00:08:00:00:03 ex.rus.uni-stuttgart.de 00:a0:24:a9:29:de zsdsinz.rus.uni-stuttgart.de … /etc/resolv.conf - name server configuration ex# cat /etc/resolv.conf nameserver nameserver domain rus.uni-stuttgart.de Eigene Ethernet-Adresse: “dmesg | grep Eth”

131
Netzwerküberwachung netstat - show network status
route - manipulate the routing tables traceroute - print the route to a host snoop - capture and inspect network packets nslookup - query name servers interactively ping - send Echo-Request to network host rpcinfo - report RPC information ndd - get and set driver parameters arp - address resolution display and control netstat –a state of all sockets netstat –i state of the interfaces netstat –r Show the routing table # route add | change | delete | get | monitor # traceroute traceroute to ( ): 1-30 hops, 38 byte packets 1 ar30a-y1-r4.rus.uni-stuttgart.de ( ) ms ms ms 2 ar30a-y1-s6.rus.loc ( ) ms ms ms 3 ( ) 1.2 ms ms ms # snoop Using device /dev/le (promiscuous mode) zsdsinz.rus.uni-stuttgart.de -> zsdjh.rus.uni-stuttgart.de XWIN R port=54387 zsdjh.rus.uni-stuttgart.de -> zsdsinz.rus.uni-stuttgart.de XWIN C port=54387 zsdjh.rus.uni-stuttgart.de -> zsdsinz.rus.uni-stuttgart.de XWIN C port=53600 ... # nslookup Server: noc2.BelWue.de Address: Non-authoritative answer: Name: Address: # ping is alive # arp -a Net to Media Table: IPv4 Device IP Address Mask Flags Phys Addr hme0 nic1.BelWue.de :d0:06:d4:40:38 hme0 noc2.BelWue.de :d0:06:d4:40:38 hme0 news.BelWue.de :d0:06:d4:40:38 # ndd /dev/tcp
: 1-30 hops, 38 byte packets. 1 ar30a-y1-r4.rus.uni-stuttgart.de ( ) 1.19 ms ms ms. 2 ar30a-y1-s6.rus.loc ( ) ms ms ms. 3 ( ) 1.2 ms ms 1.65 ms # snoop Using device /dev/le (promiscuous mode) zsdsinz.rus.uni-stuttgart.de -> zsdjh.rus.uni-stuttgart.de XWIN R port= zsdjh.rus.uni-stuttgart.de -> zsdsinz.rus.uni-stuttgart.de XWIN C port= zsdjh.rus.uni-stuttgart.de -> zsdsinz.rus.uni-stuttgart.de XWIN C port= # nslookup Server: noc2.BelWue.de. Address: Non-authoritative answer: Name: Address: # ping is alive. # arp -a. Net to Media Table: IPv4. Device IP Address Mask Flags Phys Addr hme0 nic1.BelWue.de :d0:06:d4:40:38. hme0 noc2.BelWue.de :d0:06:d4:40:38. hme0 news.BelWue.de :d0:06:d4:40:38. # ndd /dev/tcp.")
132
14. Systemdienste

133
Syslogd - log system messages
/etc/syslog.conf Konfigurationsdatei Standars-Logs: /var/adm/messages /var/log/* {syslog|authlog} console Mail an root # cat /etc/syslog.conf #ident /12/14 SMI" /* SunOS 5.0 */ # # syslog configuration file. # This file is processed by m4 so be careful to quote (`') names # that match m4 reserved words. Also, within ifdef's, arguments # containing commas must be quoted. *.err;kern.notice;auth.notice /dev/sysmsg *.err;kern.debug;daemon.notice;mail.crit /var/adm/messages *.info /var/adm/messages.info *.alert;kern.err;daemon.err operator *.alert root *.emerg * ... # cat /var/adm/messages Apr 3 09:48:25 admin yppasswdd[17130]: [ID auth.error] yppasswdd: no passwd in shadow for yptest3
 names. # that match m4 reserved words. Also, within ifdef s, arguments. # containing commas must be quoted. *.err;kern.notice;auth.notice /dev/sysmsg. *.err;kern.debug;daemon.notice;mail.crit /var/adm/messages. *.info /var/adm/messages.info. *.alert;kern.err;daemon.err operator. *.alert root. *.emerg * ... # cat /var/adm/messages. Apr 3 09:48:25 admin yppasswdd[17130]: [ID auth.error] yppasswdd: no passwd in shadow for yptest3.")
134
cron – clock daemon Führt Befehle zu vorbestimmten Zeiten aus
cron-Befehle: crontab –{e | l | r} edit | list | remove der crontab-Datei des Benutzers cron-Dateien: /etc/cron.d/cron.{allow|deny} zugelassene Benutzer /etc/default/cron cron-Defaults /var/cron/log cron-Log /var/spool/cron/crontabs crontabs der Benutzer # cat /etc/default/cron CRONLOG=YES # cat /var/cron/log ... > CMD: /usr/local/system/cmd/chk_messages.sh > /dev/null 2>&1 > root c Fri Apr 6 14:39: < root c Fri Apr 6 14:39: # ls /var/spool/cron/crontabs adm lp root sys uucp

135
crontab - Format minute (0-59), hour (0-23), day of the month (1-31),
33 08 * * * /u/rus/sinz/cmd/chk_adsm.sh > /dev/null 2>&1 minute (0-59), hour (0-23), day of the month (1-31), month of the year (1-12), day of the week (0-6 with 0=Sunday) Auszuführender Befehl # crontab -l #ident /07/06 SMI" /* SVr */ # # 10 3 * * 0,4 /etc/cron.d/logchecker 10 3 * * 0 /usr/lib/newsyslog 15 3 * * 0 /usr/lib/fs/nfs/nfsfind 1 2 * * * [ -x /usr/sbin/rtc ] && /usr/sbin/rtc -c > /dev/null 2>&1
, hour (0-23), day of the month (1-31), month of the year (1-12), day of the week (0-6 with 0=Sunday) Auszuführender Befehl. # crontab -l /07/06 SMI /* SVr */ # # 10 3 * * 0,4 /etc/cron.d/logchecker * * 0 /usr/lib/newsyslog * * 0 /usr/lib/fs/nfs/nfsfind. 1 2 * * * [ -x /usr/sbin/rtc ] && /usr/sbin/rtc -c > /dev/null 2>&1.")
136
15. Backup / Restore

137
Backup / Restore - Befehle
cp tar cpio ufsdump ufsrestore TSM, siehe: volcopy dd compress / uncompress pack / unpack gzip / gunzip

138
TSM – Backup (Installation)
Software (tar-file) holen von: ftp://ftp.rz.uni-karlsruhe.de /pub/tsm/mirror/maintenance/client/.../LATEST/ tar -file ausgepacken Package installieren # pkgadd -d <dir><package> Auswahl: IBMadsm-c (Client). TSM-Backup: Im README unter ftp://ftp.rz.uni-karlsruhe.de/pub/tsm/mirror/maintenance/client/.../LATEST/ sind wichtige Systeminformationen enthalten. Installieren: 1) Software (tar-file) holen von ftp://ftp.rz.uni-karlsruhe.de/pub/tsm/mirror/maintenance/client/.../Solaris/LATEST/ => tar-file 2) tar -file ausgepacken 3) Installation: # pkgadd -d <dir><package> Auswahl: IBMadsm-c ADSTAR Distributed Storage Manager Solaris 2.6 Client). Konfigurieren: 1) Editieren von: - dsm.opt SErvername rusadsm1 DOMAIN / - dsm.sys SErvername rusadsm1 TCPServeraddress rusadsm1.rus.uni-stuttgart.de NODename IUB_ADMIN - backup.excl ... excludes 2) in /etc/inittab eintragen: ----- # start ADSM-Scheduler adsm::once:/opt/IBMadsm-c/dsmc sched >/dev/null 2>&1 & 3) Mail an Server-Betreuung Mit den geforderten Angaben ueber den Rechner
 holen von: ftp://ftp.rz.uni-karlsruhe.de /pub/tsm/mirror/maintenance/client/.../LATEST/ tar -file ausgepacken. Package installieren. # pkgadd -d <dir><package> Auswahl: IBMadsm-c (Client). TSM-Backup: Im README unter ftp://ftp.rz.uni-karlsruhe.de/pub/tsm/mirror/maintenance/client/.../LATEST/ sind wichtige Systeminformationen enthalten. Installieren: 1) Software (tar-file) holen von. ftp://ftp.rz.uni-karlsruhe.de/pub/tsm/mirror/maintenance/client/.../Solaris/LATEST/ => tar-file. 2) tar -file ausgepacken. 3) Installation: # pkgadd -d <dir><package> Auswahl: IBMadsm-c ADSTAR Distributed Storage Manager Solaris 2.6 Client). Konfigurieren: 1) Editieren von: - dsm.opt. SErvername rusadsm1. DOMAIN / - dsm.sys. SErvername rusadsm1. TCPServeraddress rusadsm1.rus.uni-stuttgart.de. NODename IUB_ADMIN. - backup.excl. ... excludes. 2) in /etc/inittab eintragen: # start ADSM-Scheduler. adsm::once:/opt/IBMadsm-c/dsmc sched >/dev/null 2>&1 & 3) Mail an Server-Betreuung Mit den geforderten Angaben ueber den Rechner.")
139
TSM – Backup (Konfiguration)
dsm.opt anpassen: SErvername rusadsm1 DOMAIN / Zu sichernde Verzeichnisse dsm.sys anpassen: SErvername rusadsm1 TCPServeraddress rusadsm1.rus.uni-stuttgart.de NODename INS_HOST backup.excl anpassen (ausgeschl. Verzeichnisse) Scheduler-Eintrag in /etc/inittab: adsm::once:/opt/IBMadsm-c/dsmc sched >/dev/null 2>&1 & Mail an TSM-Backup: Im README unter ftp://ftp.rz.uni-karlsruhe.de/pub/tsm/mirror/maintenance/client/.../LATEST/ sind wichtige Systeminformationen enthalten. Konfigurieren: 1) Editieren von: - dsm.opt SErvername rusadsm1 DOMAIN / - dsm.sys SErvername rusadsm1 TCPServeraddress rusadsm1.rus.uni-stuttgart.de NODename IUB_ADMIN - backup.excl ... excludes 2) in /etc/inittab eintragen: ----- # start ADSM-Scheduler adsm::once:/opt/IBMadsm-c/dsmc sched >/dev/null 2>&1 & 3) Mail an Server-Betreuung Mit den geforderten Angaben ueber den Rechner
 Scheduler-Eintrag in /etc/inittab: adsm::once:/opt/IBMadsm-c/dsmc sched >/dev/null 2>&1 & Mail an TSM-Backup: Im README unter ftp://ftp.rz.uni-karlsruhe.de/pub/tsm/mirror/maintenance/client/.../LATEST/ sind wichtige Systeminformationen enthalten. Konfigurieren: 1) Editieren von: - dsm.opt. SErvername rusadsm1. DOMAIN / - dsm.sys. SErvername rusadsm1. TCPServeraddress rusadsm1.rus.uni-stuttgart.de. NODename IUB_ADMIN. - backup.excl. ... excludes. 2) in /etc/inittab eintragen: # start ADSM-Scheduler. adsm::once:/opt/IBMadsm-c/dsmc sched >/dev/null 2>&1 & 3) Mail an Server-Betreuung Mit den geforderten Angaben ueber den Rechner.")
140
TSM – Backup (Bedienung)
Aufruf Graphisches Werkzeug: dsm Kommandozeile: # dsmc # dsmc ADSTAR Distributed Storage Manager Command Line Backup Client Interface - Version 3, Release 1, Level 0.7 (C) Copyright IBM Corporation, 1990, 1999, All Rights Reserved. dsmc> help The following help topics are available. Enter the number of the desired help topic or 'q' to quit, 'd' to scroll down, 'u' to scroll up. 0 - Using Commands 1 - ARCHIVE 2 - CANCEL RESTORE 3 - DELETE ACCESS 4 - DELETE ARCHIVE 5 - DELETE FILESPACE 6 - HELP 7 - INCREMENTAL 8 - LOOP 9 - MACRO 10 - QUERY ACCESS 11 - QUERY ARCHIVE 12 - QUERY BACKUP 13 - QUERY FILESPACE 14 - QUERY MGMTCLASS 15 - QUERY RESTORE 16 - QUERY SCHEDULE 17 - QUERY SESSION 18 - RESTART RESTORE 19 - RESTORE 20 - RETRIEVE 21 - SCHEDULE 22 - SELECTIVE 23 - SET ACCESS 24 - SET PASSWORD .....
 Copyright IBM Corporation, 1990, 1999, All Rights Reserved. dsmc> help. The following help topics are available. Enter the number of the desired help topic or q to quit, d to scroll down, u to scroll up. 0 - Using Commands. 1 - ARCHIVE. 2 - CANCEL RESTORE. 3 - DELETE ACCESS. 4 - DELETE ARCHIVE. 5 - DELETE FILESPACE. 6 - HELP. 7 - INCREMENTAL. 8 - LOOP. 9 - MACRO QUERY ACCESS QUERY ARCHIVE QUERY BACKUP QUERY FILESPACE QUERY MGMTCLASS QUERY RESTORE QUERY SCHEDULE QUERY SESSION RESTART RESTORE RESTORE RETRIEVE SCHEDULE SELECTIVE SET ACCESS SET PASSWORD")
141
Backup Systemplatte Single User Mode (wenn möglich) Backup / auf Band
# shutdown -g30 –y Backup / auf Band # ufsdump 0ucf /dev/rmt/0 / (/usr, /opt, …) Zurück in den Multi User Mode Cntrl+D
 Zurück in den Multi User Mode. Cntrl+D.")
142
Restore Systemplatte # mount /dev/dsk/c0t3d0s0 /mnt (neue Platte)
# cd /mnt # ufsrestore rvf /dev/rmt/0 # cd / # umount /mnt # installboot \ /usr/platform/sun4m/lib/fs/ufs/bootblk \ /dev/rdsk/c0t3d0s0 # init 6 (Reboot)
")
143
Notboot von Solaris boot cdrom (im Monitor-Modus)
Warten bis OpenWindows gestartet ist (Systeminstallations-Fenster erscheint) Mausklick auf Workspace “Command Tool” öffnen => Kommandoausführung (ufsrestore, ….)
 Mausklick auf Workspace. Command Tool öffnen. => Kommandoausführung (ufsrestore, ….)")
144
16. Serviceangebot von SUN
Sun Professional Services Sun Support Services Sun Educational Services

145
Sun Professional Services
IT-Architekturberatung Planung von unternehmensweiten heterogenen Netzwerken Systemintegration und Implementierung von kundenspezifischen Lösungen Projektmanagement, Generalunternehmerschaft

146
Sun Support Services SunSpectrum PLATIN - Mission-Critical Support
SunSpectrum GOLD - Business-Critical Support SunSpectrum SILBER - System Support SunSpectrum BRONZE - Self Support

147
SunSolve Service Online Informationsdatenbank, zum Teil nur für Kunden mit SunSpectrum-Servicevertrag [ Gezielte Suche oder Durchblättern der Information Download von Patches Zugriff auf diagnostische Werkzeuge Automatisches Update von ausgewählten Dokumenten (Auf CD-ROM, falls kein Internet-Anschluss vorhanden)
")
148
Sun Educational Services
Standard Trainings Solaris, Java, Netzwerke, Applikationen, … (bei SUN) Indivduelle Firmen Trainings Standard- oder individuelle Inhalte vor Ort Enterprise Consulting Services Management von Ausbildungsprojekten Technology Based Training Lernsoftware, Online-Learning
 Indivduelle Firmen Trainings. Standard- oder individuelle Inhalte vor Ort. Enterprise Consulting Services. Management von Ausbildungsprojekten. Technology Based Training. Lernsoftware, Online-Learning.")
149
17. Weitere Informationen

150
Internet-Adressen Mailliste:
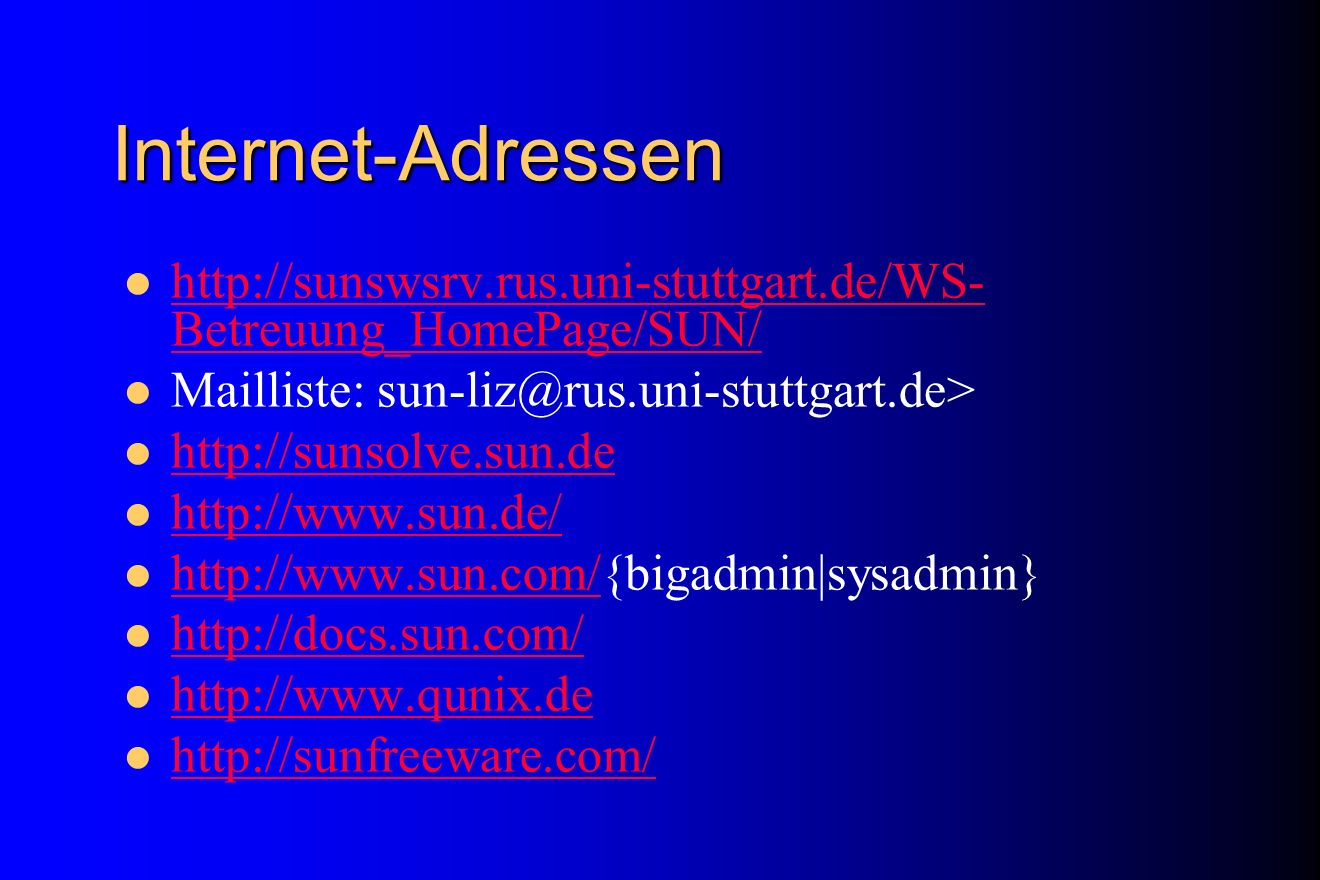
151
Bücher / Answerbook Solaris 7 Systemadministration
Handschuch, Thomas; Springer-Verlag Berlin Heidelberg (2000) PDF-Dateien unter System Administration Guide, Volume 1 - 3 Solaris Answerbook
 PDF-Dateien unter System Administration Guide, Volume Solaris Answerbook.")
152
System Administration Guide, Volume 1
"Managing Users and Groups Topics" "Managing Server and Client Support Topics" "Shutting Down and Booting a System Topics" "Managing Removable Media Topics" "Managing Software Topics" "Managing Devices Topics" "Managing Disks Topics" "Managing File Systems Topics" "Backing Up and Restoring Data Topics"

153
System Administration Guide, Volume 2
"Managing Printing Services Topics" "Working With Remote Systems Topics" "Managing Terminals and Modems" "Managing System Security Topics" "Managing System Resources Topics" "Managing System Performance Topics" "Troubleshooting Solaris Software Topics"

154
System Administration Guide, Volume 3
"Network Services Topics" "IP Address Management Topics" "Modem-Related Network Services" "Accessing Remote File Systems Topics" "Mail Services Topics" "Monitoring Network Services Topics"

155
Solaris - Systemadministration
Rechenzentrum Universität Stuttgart

Ähnliche Präsentationen


 – A. Paul.>")
 Windows I Nützliche Kommandos (Kommando und /? liefert meist eine Liste von Optionen): cd bzw. chdir: change directory, wechselt.>")

 Trackball. Joystick.>")